| Building
Tamiya's M3 Lee |
 |
The Lower Hull Interior
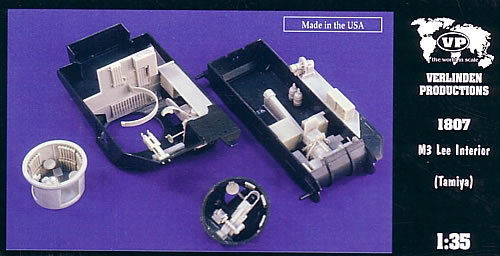
If you love tank interiors, the Lee gives you two side doors, the front driver's visor, the hatch the roof over the canon, and the commander's cupola. You could even open the small visors around the hull and on the turret if you desired. Not only do you get more angles for viewing the interior, you also get more light sources to see more detail. Of course, visibility is relative. It's still an enclosed vehicle and not an open top. For most people, the Verlinden interior will (or Academy interior) will suffice. But I tried to add as much as I could, and did not glue my turret in place so I could get a better look at it when it was all completed. If you want to go all out, there are rivets and bracing on the inside walls of the tank as well as outside, and you can let the exterior be your guide. But as far as other details go, the few interior images available often add to confusion rather than clearing it up since you rarely know exactly which variant you're eyeballing.
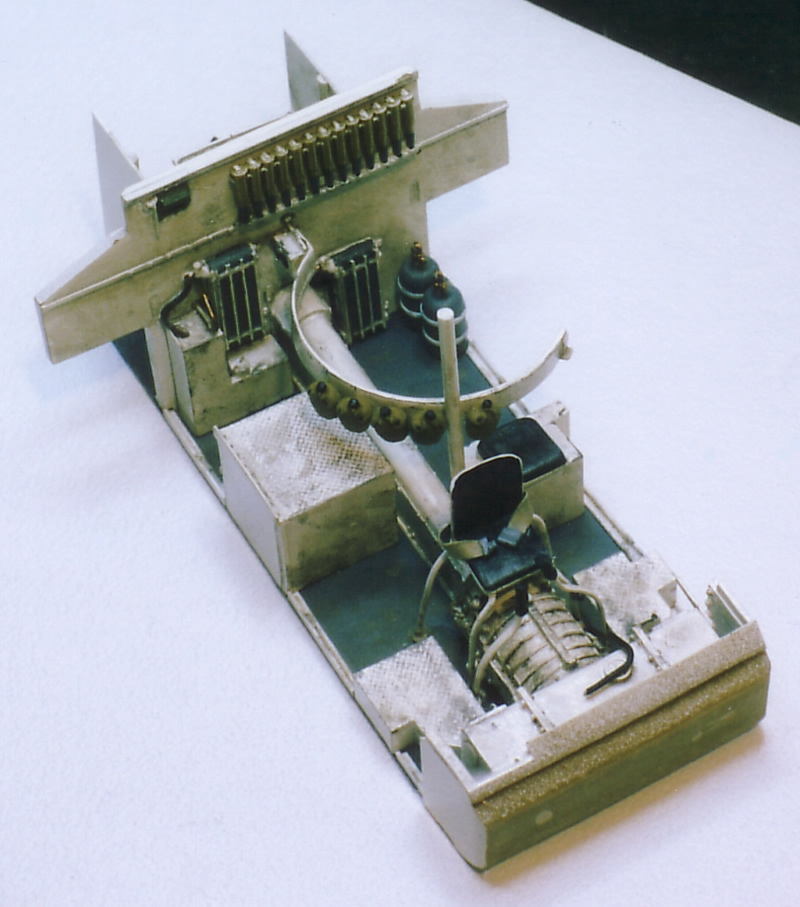
The first thing I noticed as I explored and dry fit the VP pieces was that the back wall, which extends out over the hull, was just a bit short of touching the bottom of the hull. As I was thinking about how to shim it, I was also considering that I might need to get a new hull if my build of the TMD suspension went sour (as it did) and I had to revert to the Tamiya suspension (which I did) and/or replace the altered Lee hull (which, of course, I did). This is where thinking ahead and planning for contingencies paid off! I used a thin sheet of plastic as a base for doing most of the interior as a subassembly that could be slipped in and out of the hull. The transmission case and shaft, seats, ammo locker, etc. were glued to this platform, as was the rear wall (after carefully determining how far back in the hull it could sit and still accommodate the upper hull when it attached to the lower hull). The VP instructions point out vague areas for positioning the interior pieces so be prepared for a lot of dry fitting here, too. I added a support pole behind the driver's seat (which needs some scratchbuilt legs instead of sitting on the tranny as Verlinden directs). With
my interior on a separate base, I was able to paint the hull separately.
When time came for final assembly, I just dropped the interior compartment
into the hull. Introduction
and Research Notes |
 |
 |
 |
 |
 |
 |
 |
 |
 |
 |
 |
 |
|