|
Building
the Italeri Late M7 Priest |
 |
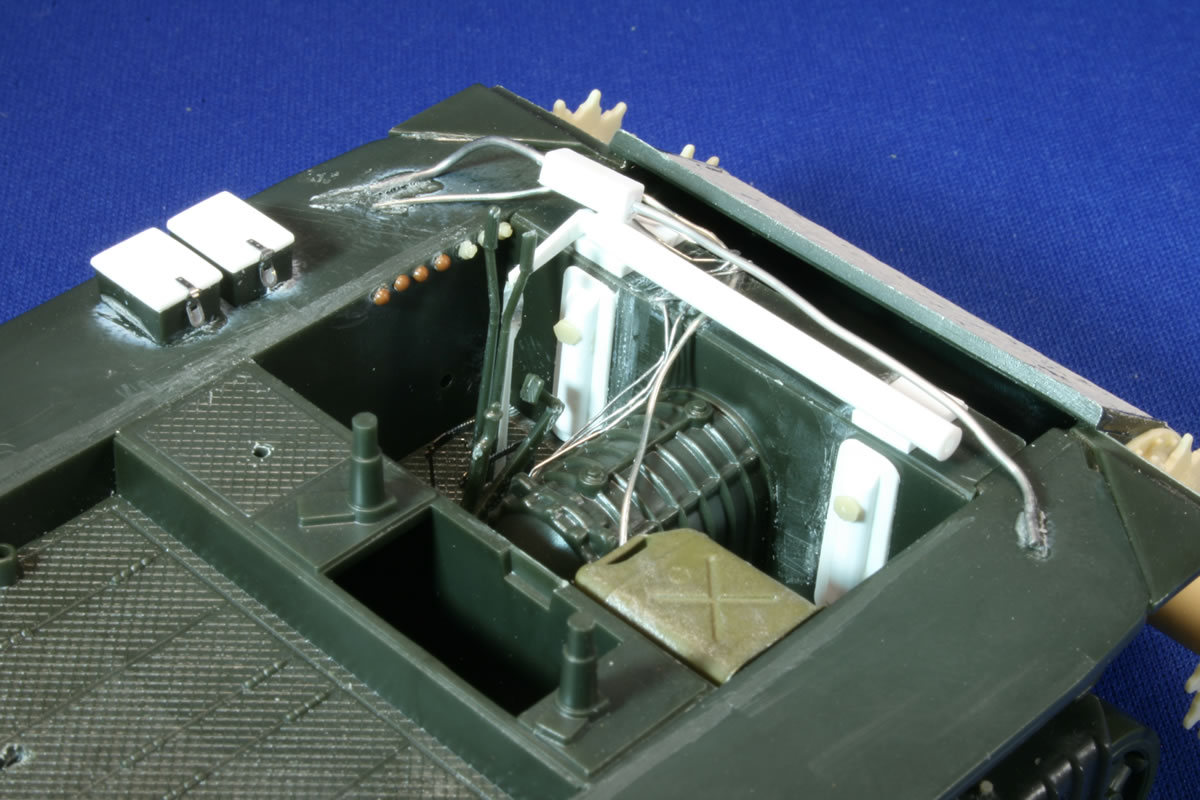
Driver's
Compartment
Even though this is an open-topped vehicle, it's difficult to see much detail in the driver's compartment (and even less on the right side) without direct lighting. Nonetheless, the space can use some detailing to add more visual interest and depth. The differential housing cover is presented as a flat slab. I added a pair of scratch built steering brake covers and the steering brake shaft that lies horizontally across the cover, and some wiring. The drive shaft does not extend from the transmission to underneath the deck, but it can't be seen once the model is completed. I ran some wiring through the area as seen in photos. On the right side of the transmission of the late Priest was some sort of locker on which a spare jerry can could be stowed.
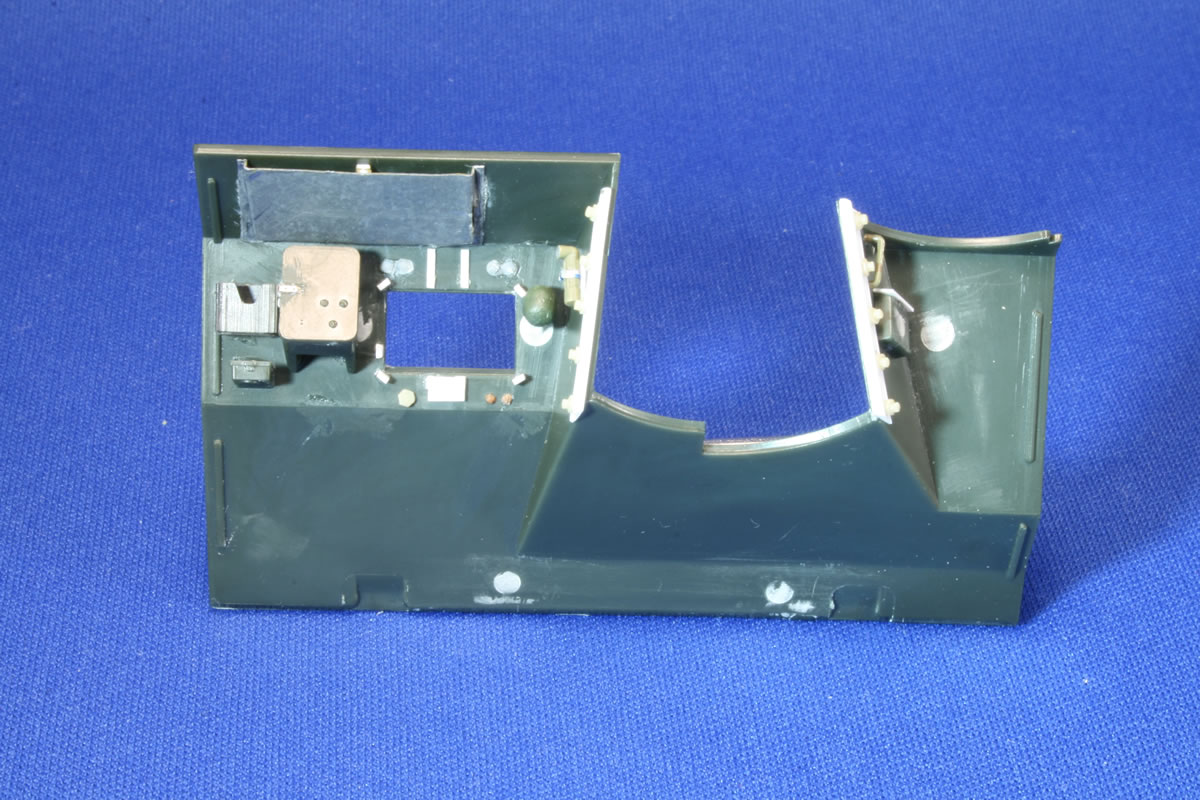
Also on this wall is a fitting to hold…something. I wasn't able to determine what was supposed to go there, and filled it with a canteen in my Academy Priests. But since this Priest was to be set in winter, I left it empty, presuming the canteen would be someplace less susceptible to freezing. The biggest challenge in this area of the Priest was trying to figure out how the heck to create the long bolted flanges on the edges of the wall stubs that butt against the howitzer shield. These are very distinctive features of the Priest that are missing from both the Italeri and Academy kits, and from most finished models no matter how well detailed. Viewed from above, they are shaped something like a question mark, which I tried to create with some lead foil. The foil, however, would easily lose its shape while I tried to work with it to determine the correct placement so as to not be too close to the howitzer shield. I finally decided to use some strips of flat and half round plastic, to which I added rows of bolts from Precision Scale. The results are quite satisfactory for me. The TM stowage list indicates a first aid box was situated on a bracket located on the left wall near the front above the weapon holders. I added a spare box left over from the AFV Club M10 that I used as the donor kit for my M36B1. On the left sponson, the kit includes the correct instrument panel for the mid to late Priest, which can be improved with the Eduard set. There are two featureless boxes, in which spare .45 clips and possibly hand grenades were stowed. The tech manuals show a couple different sizes of boxes, some appearing to possibly having handles that would suggest drawers. The Eduard set offers latches, perhaps based on a revised box style. Without a definitive image, I put my faith in the photo etch and made some Plasticard covers to suggest bins. A final note about the front sponsons: The lower hull is taken from Italeri's M4A1 Sherman, and the sponsons require separate extension pieces for the Priest. If you use photo etch fenders, you'll want to cut off the plastic before gluing the pieces in place. Positioning the pieces closer toward the differential case will create gaps on the outer sides where the sponsons meet the hull. I used some thin strips of Evergreen plastic to fill these gaps. Introduction |
 |
 |
 |
 |
 |
 |
 |
 |
 |
 |
 |
 |
|