|
Building
the Italeri Late M7 Priest |
 |
Suspension
and Lower Hull
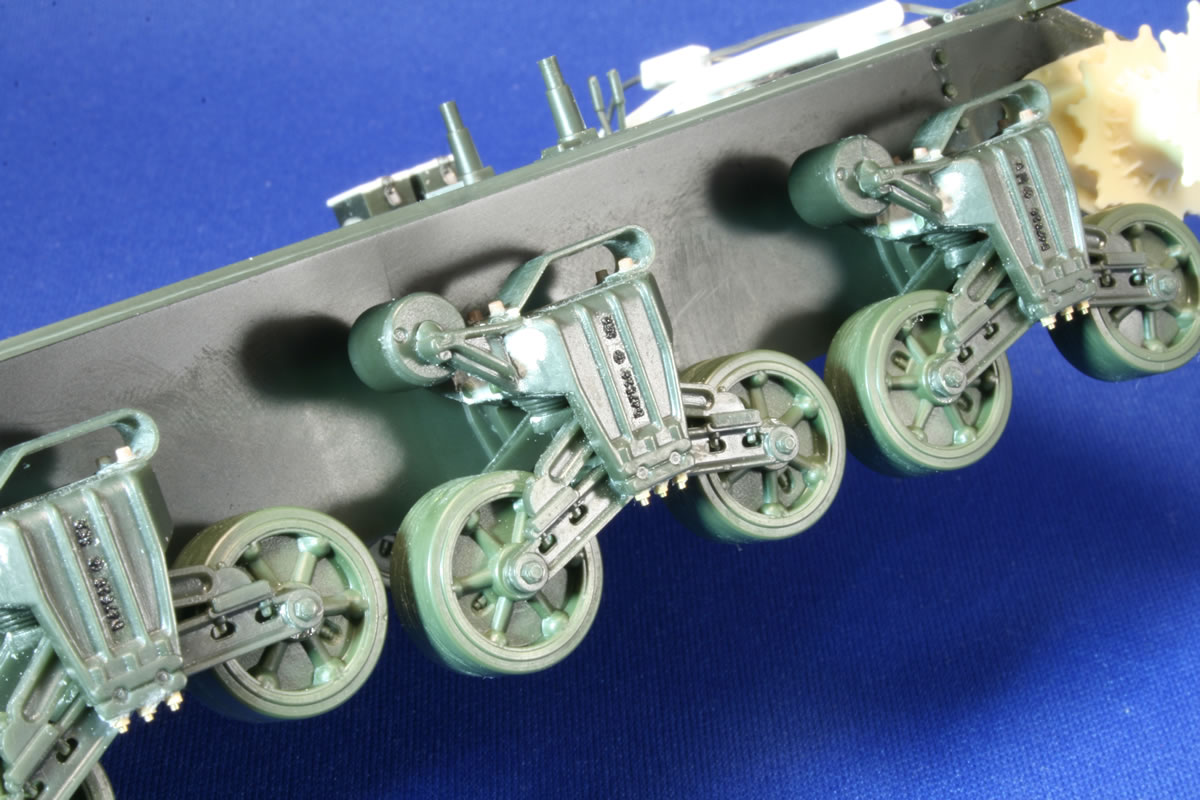
The late Priest also had adopted the raised arm bogie units, which the Italeri kit possesses. After the bogies were assembled, I addressed the seams with putty and the sanding stick, added the necessary bolts (from LionMarc and Verlinden), and opened the empty bolt holes on the bogie faces opposite the trailing arms. I added casting numbers from Archer. Fixing these old Italeri suspensions takes time, but any suspension, even Tasca's, requires some work to raise the level of accuracy.
The late M7 was equipped with the "sharp-nose" differential cover that Italeri provides. Based on the Priest at Aberdeen Proving Grounds, I added casting marks to the bottom edge of the nose. I set the marks, taken from Archer Fine Transfer's excellent Surface Details #7 on a thin piece of plastic to replicate the distinctive raised area seen on the APG vehicle. Casting IDs and foundary symbols were stamped into the large sand molds, so variations in pressure might produce outlines or stronger impressions of the stamp. I used Mr. Surfacer to give some texture to the nose, and detailed the fittings for the towing cables.
I opted to use the kit's locking pins for the air cleaners rather than the Eduard parts. One of the idler axles had a sink mark in it which I left to be covered with a dab of mud. Eduard provides a replacement for the large metal grill that hangs diagonally off the upper rear plate, which was used to diffuse the dust-raising exhaust. I prefer the thickness of the kit part, but there are two nasty pin marks on the outside face. They're not that noticeable but if you build for competition you'll need to eliminate them. One option is to try to fill in the depressions and reshape the the crosspieces of the grill. The easier route is to remove the two attachment arms that angle off the top of the piece and glue them back in place facing the opposite direction. That allows you to use the other "pristine" side to face the viewer. You need to remove the two arms carefully and squarely; if you lose too much of the arms, the bottom of the grill will not reach the lower attachment points on the back hull wall. Introduction |

 |
 |
 |
 |
 |
 |
 |
 |
 |
 |
 |
 |
|