| Building
an M36B1 from Tank WorkShop |
 |
The Hull Interior
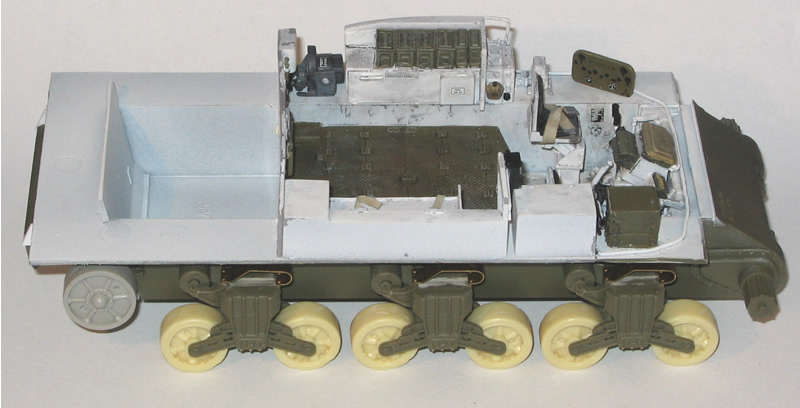
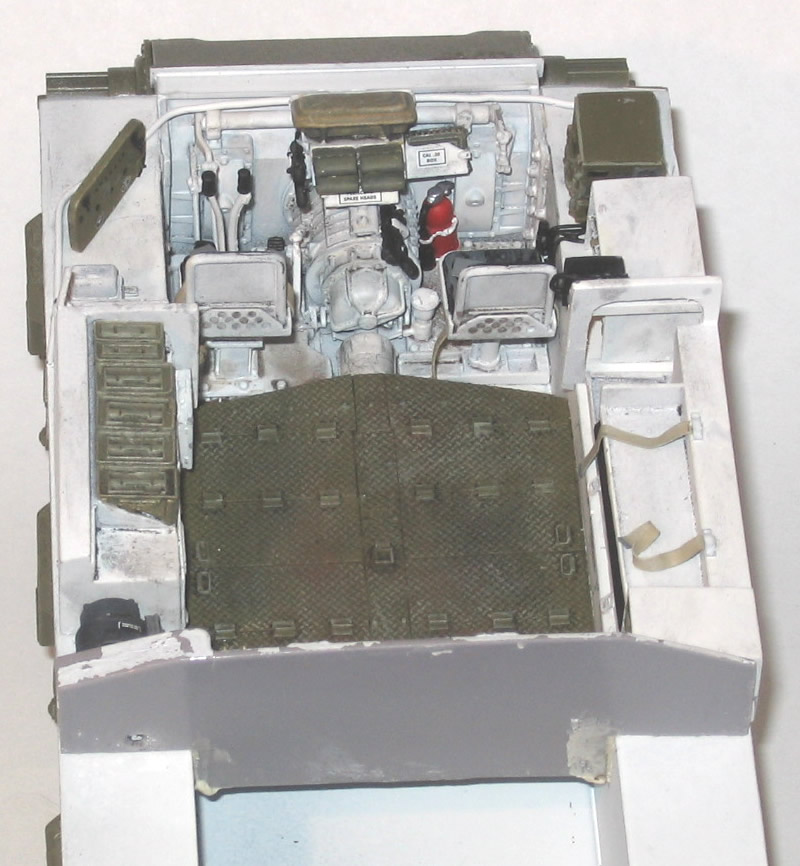
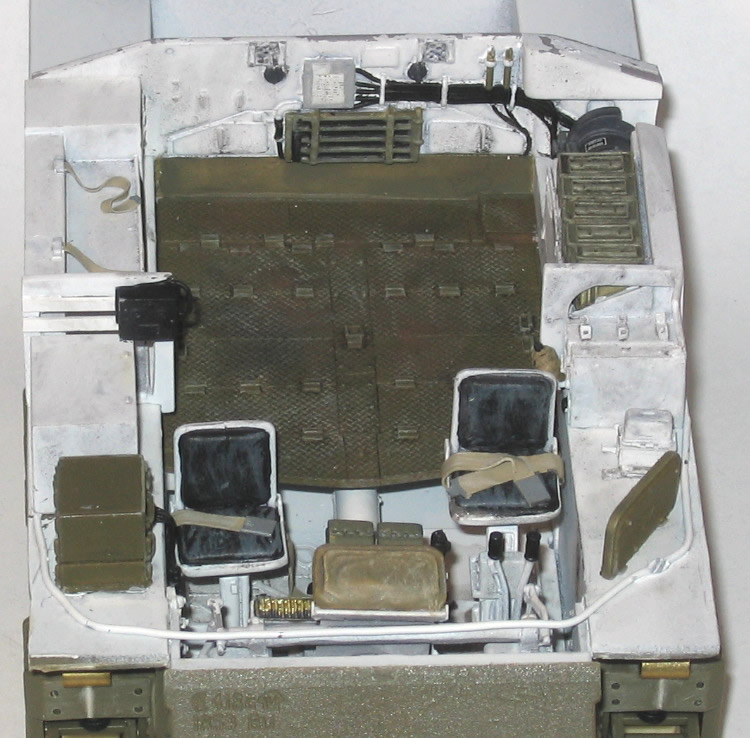
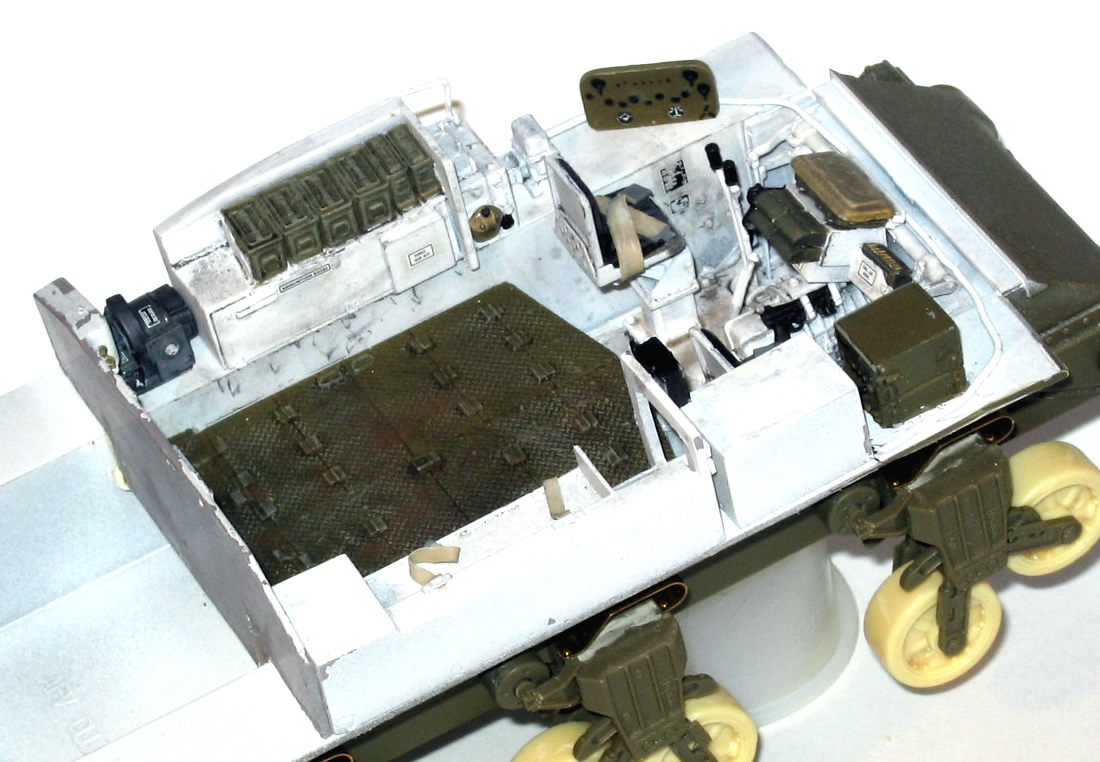
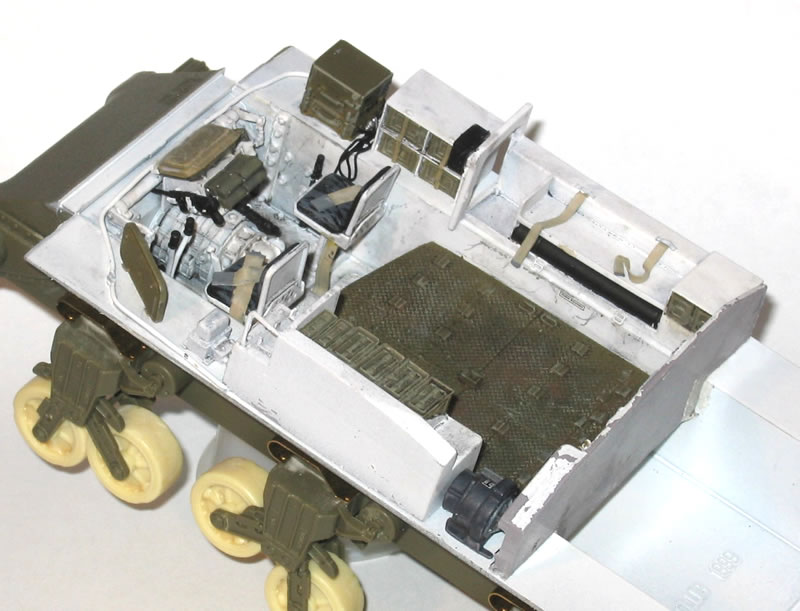
This conversion requires that you perform some fairly significant surgery on the AFV Club lower hull, and, naturally, this should be done before decking out the interior. Four millimeters need to be removed from the outer edges of the sponsons, as well as one millimeter from the front and rear edges. Other stubs and placement points on the floor and sponsons must be carved away and smoothed with some sandpaper. Once that's done it's good to install the final drive housing and the rear plate, then see how well the resin upper hull fits in place. This is where I noticed the shrinkage problem with the TWS part, particularly where the glacis meets the housing. Later it would take some pressure applied while using the superglue and a bit of Testors contour putty to bridge the small gap. Hull InteriorThe M36B1 hull interior stitches together features of the M4A3 (primarily in the front and the rear bulkhead) and the combat compartment for the tank destroyer, which required a different configuration for ammo stowage. My references had gaps in coverage or contradictions between them. The instructions from TWS do not specify the exact placement of parts, so you need to eyeball them. Make sure you dry fit everything several times. I used the placement of the rear wall as my guide and positioned parts as they led to the front of the vehicle. For me, this interior is the best feature of the TWS set, though not without its glitches. A couple parts were AWOL from the kit, but Jay got those to me quickly. My box came with a pair of extra dividers; one seemed to be ID'd in the instructions, but not the other. After consulting my spotty references and a couple emails back and forth with Jay, it turned out they were from a different kit. The TWS kit doesn't provide 100% of what you need inside, but close. I added straps for the ammo bin, seat belts, and some wiring for the front. The AFV Club decal set provides an assortment of equipment labels, but mainly for the turret interior. I used a number of markings from the more extensive sheet from Fingerprint Designs. I just wish they could be seen better once in place! But I like knowing they are there.
|
 |
 |
 |
 |
 |
 |
 |
 |
 |
 |
 |
 |
|