|
Building
Baboon |
 |
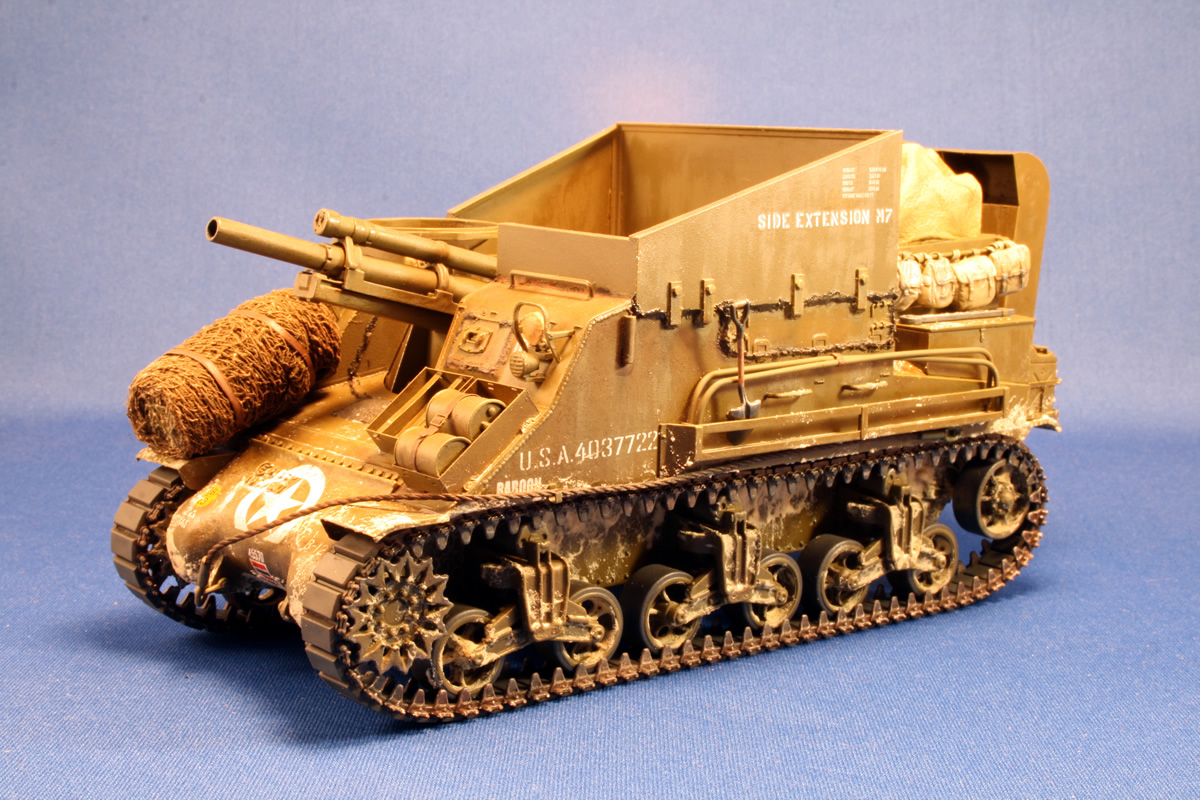
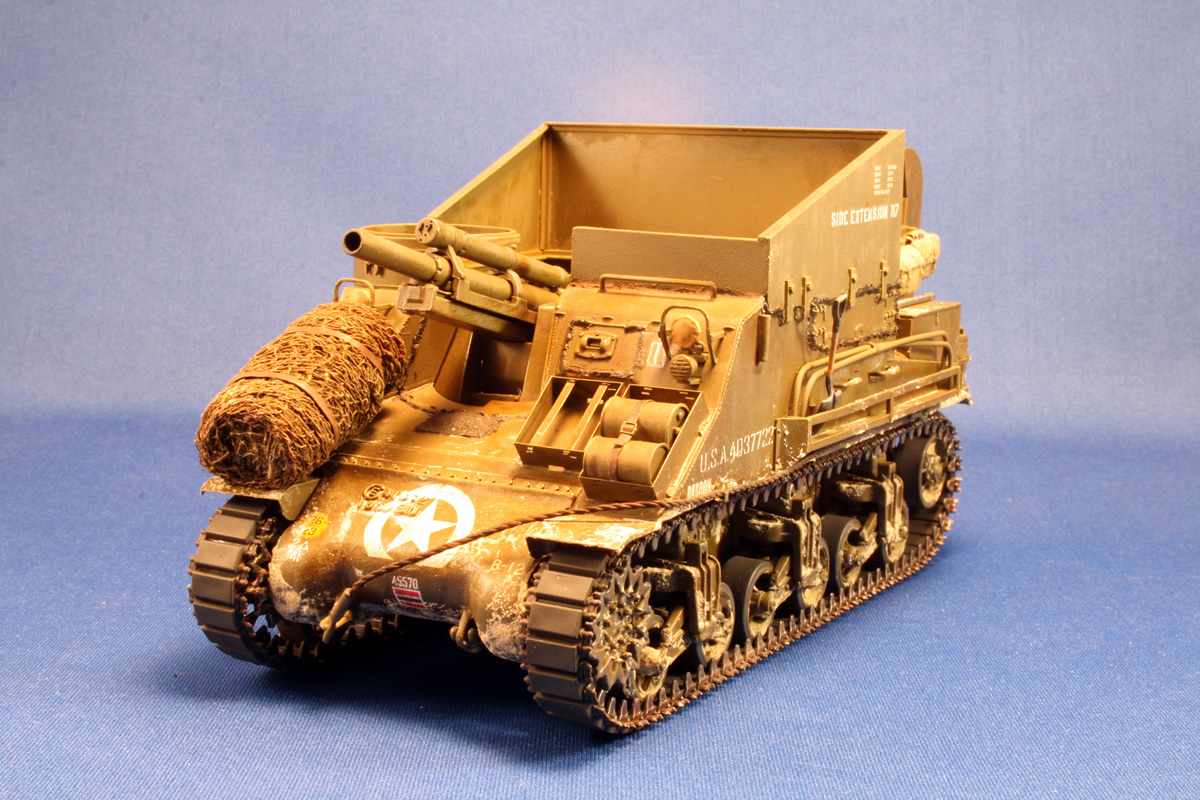
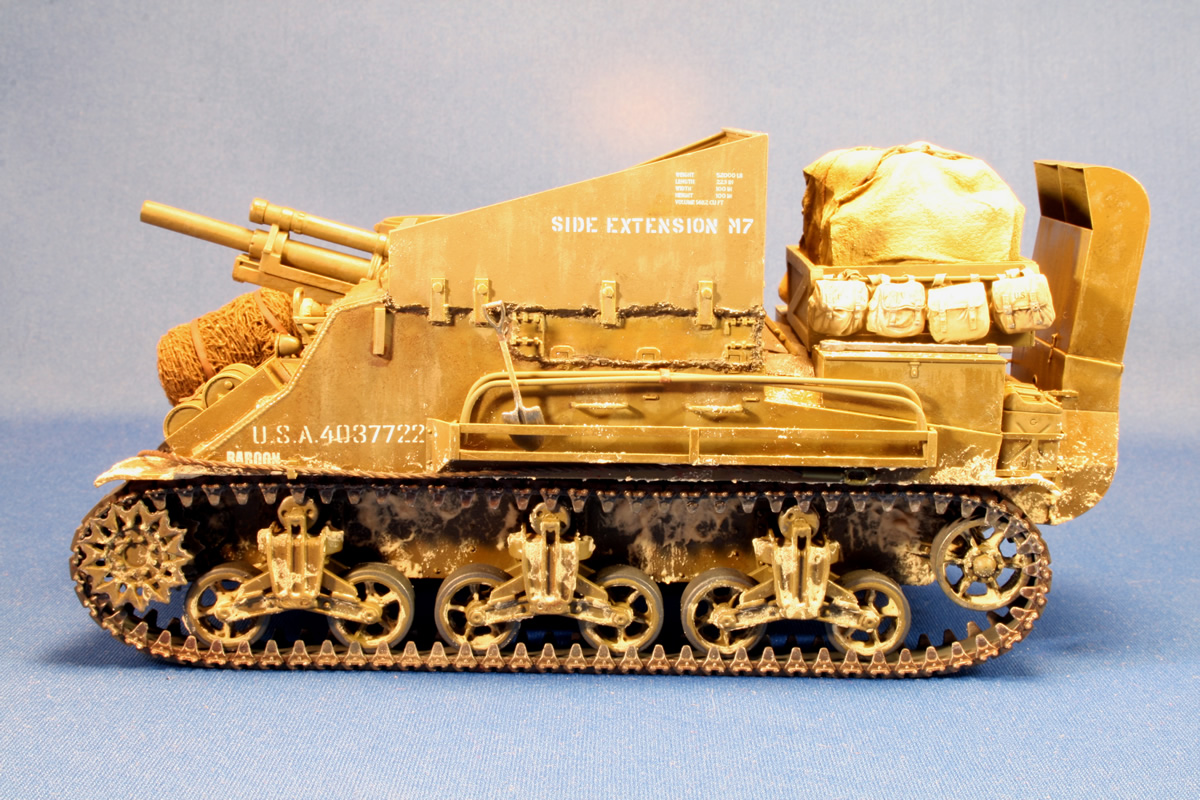
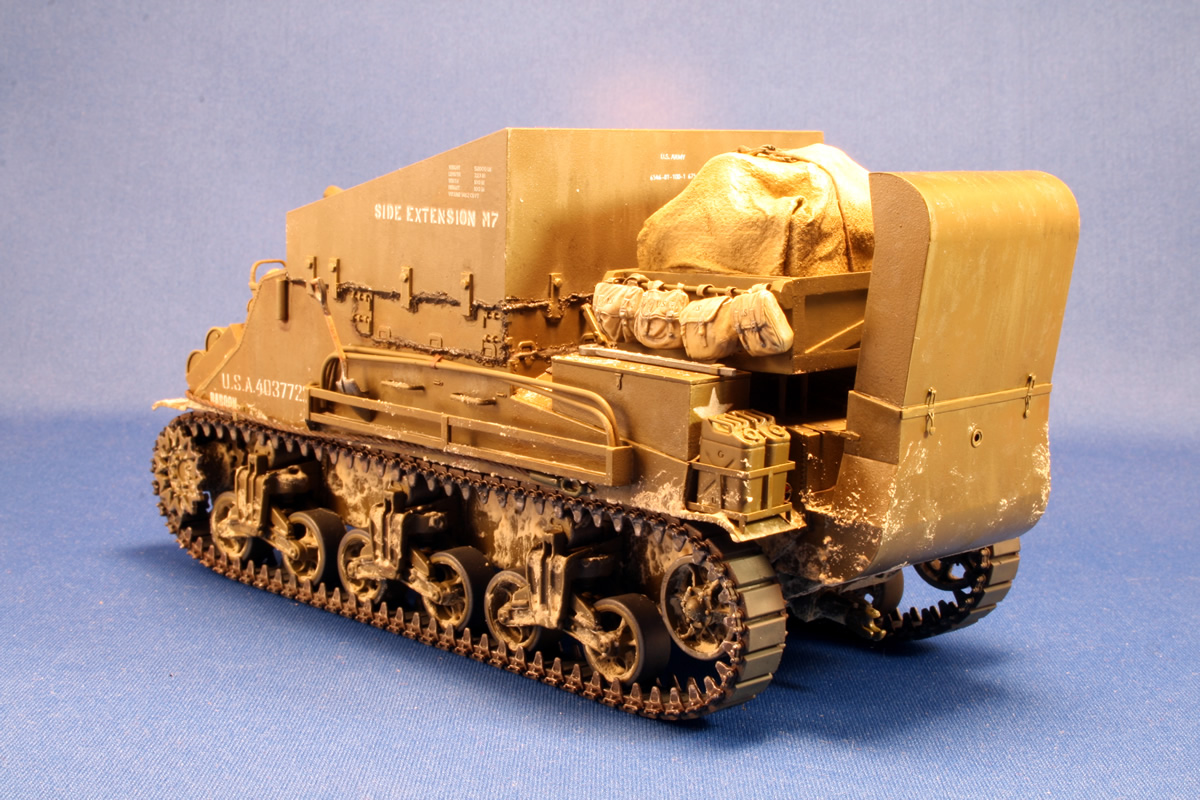
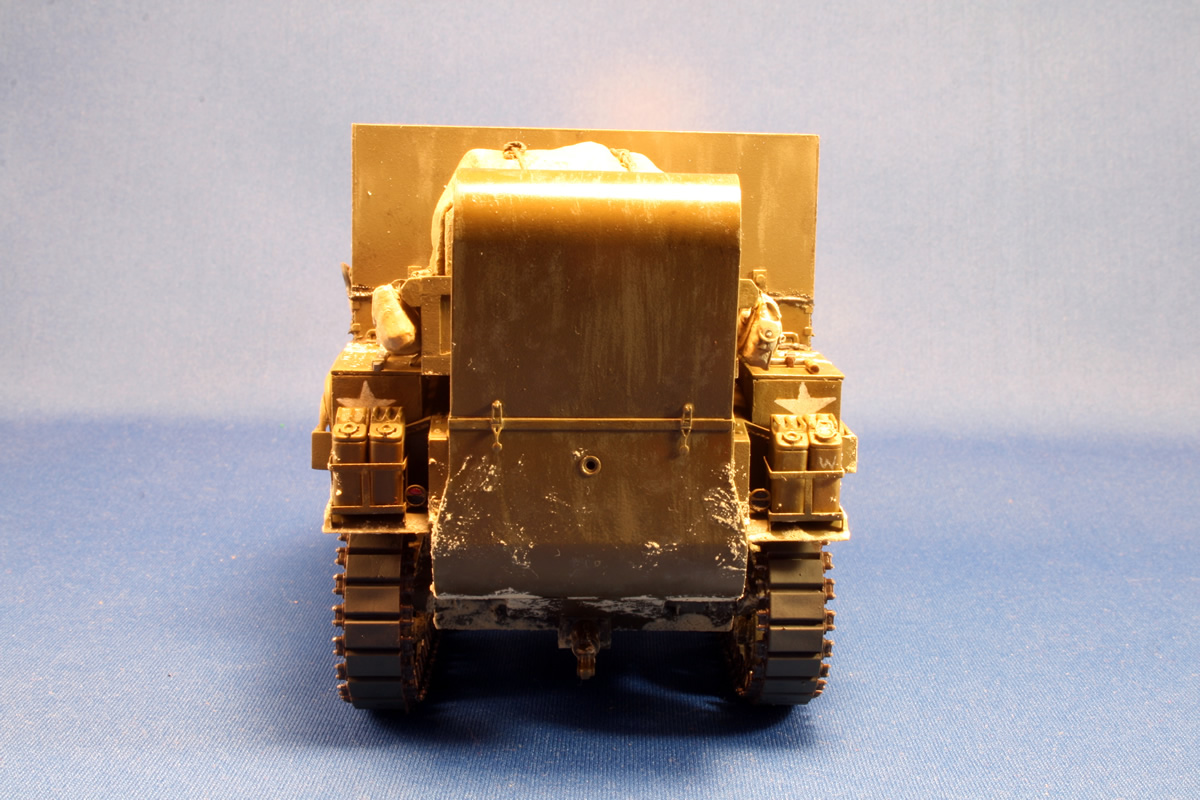
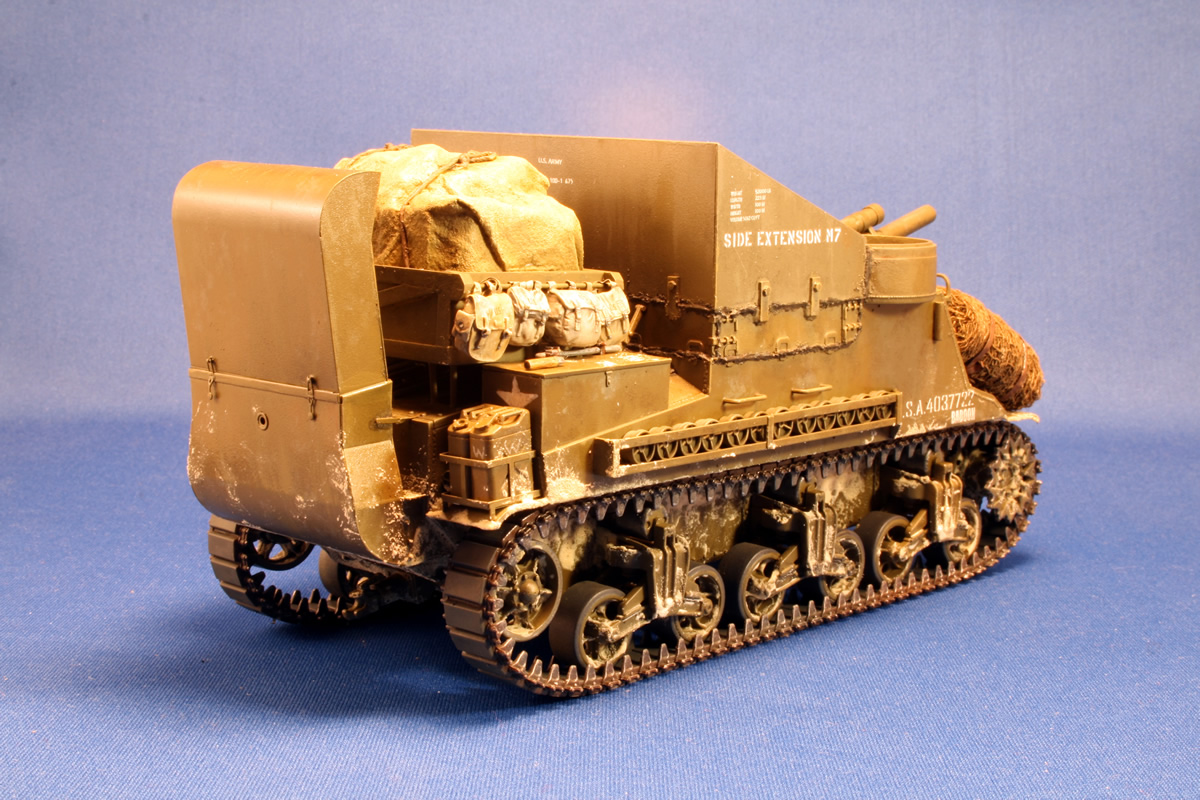
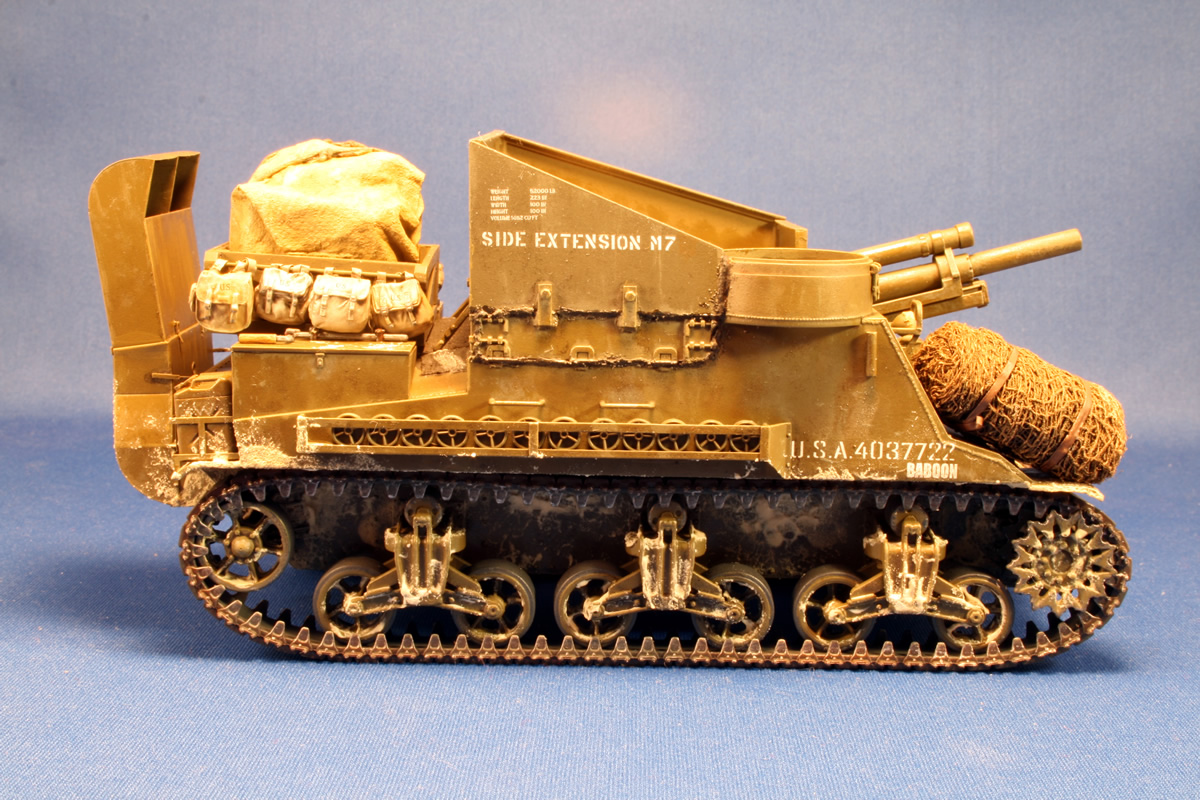
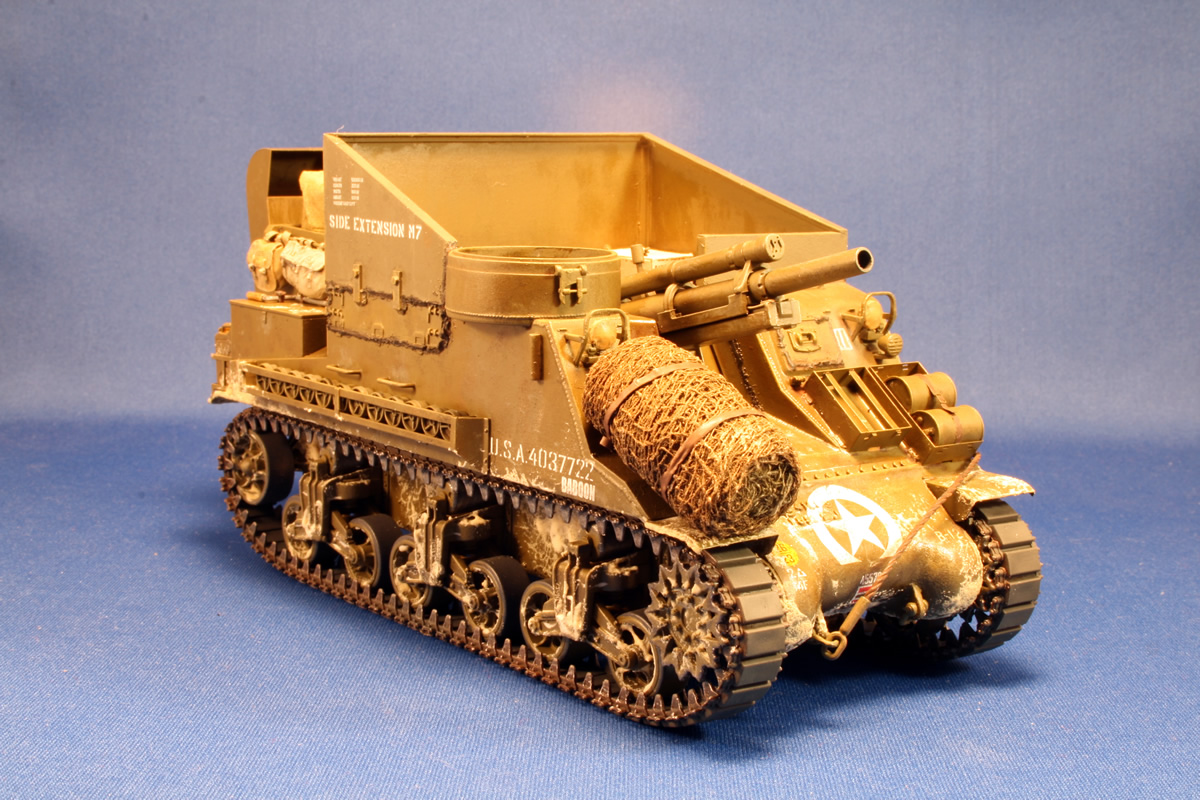
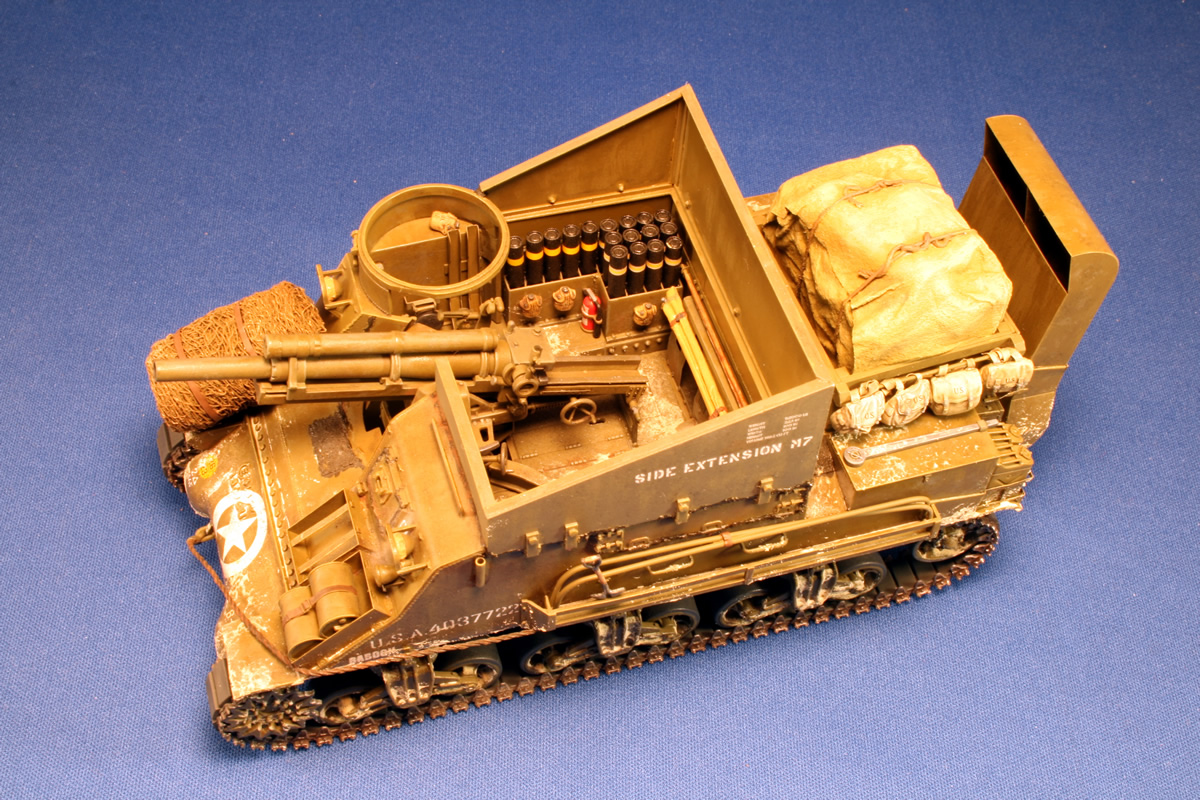
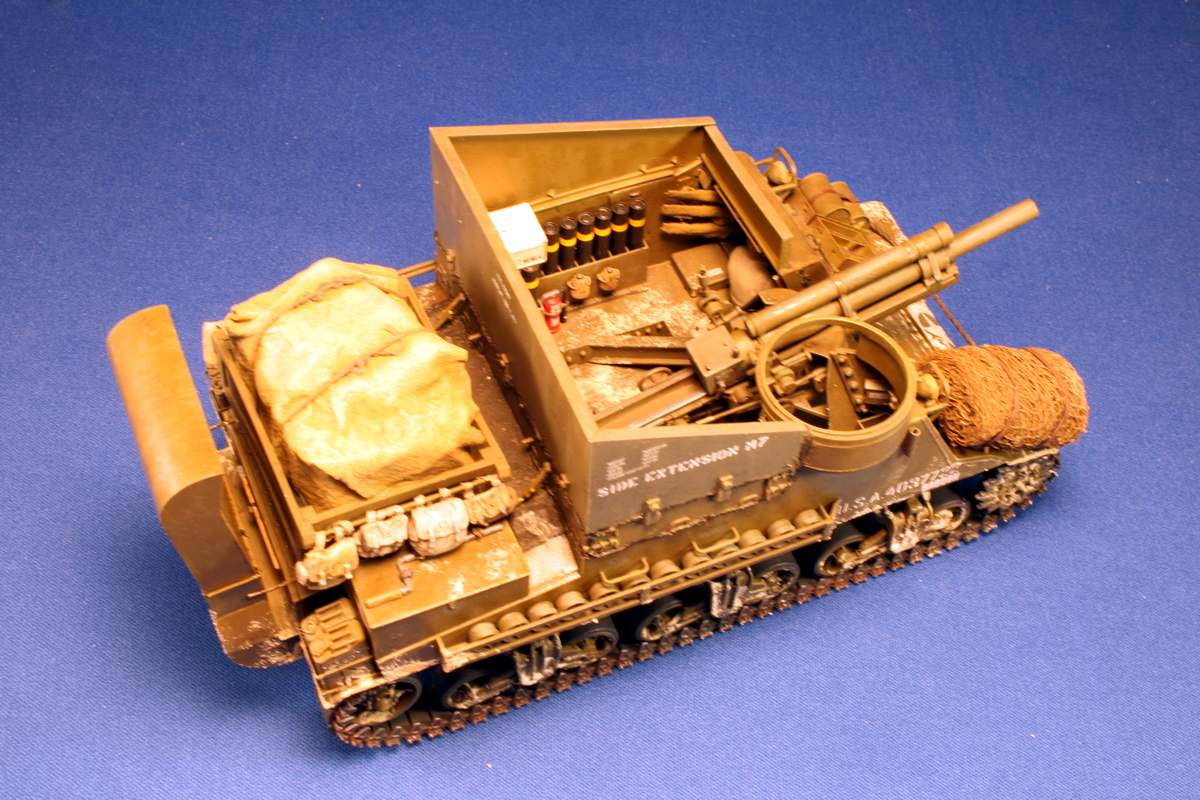
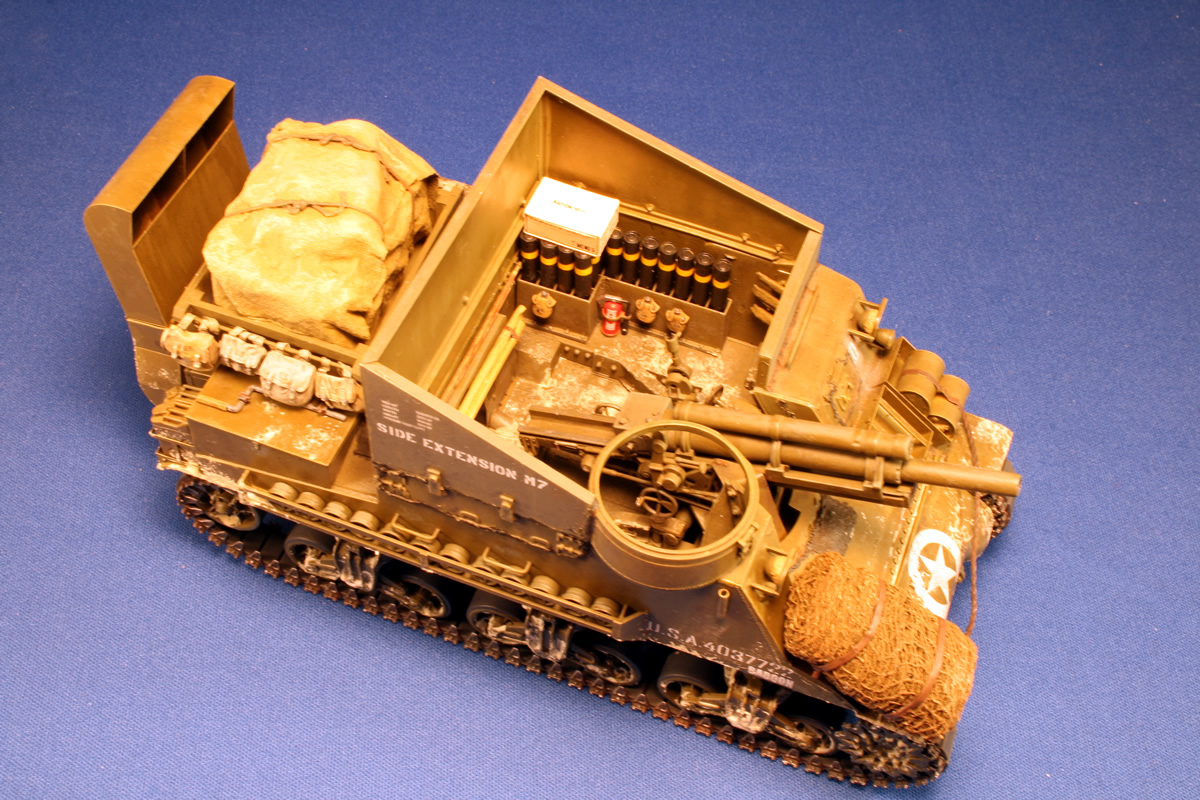
Painting, Decals, and WeatheringI used my customary Model Master rattle can OD as the base coat of the vehicle and wading trunk, but airbrushed the side extension walls in PollyScale OD, which is a bit lighter and grayer. I wanted to convey to viewers unfamiliar with the wading apparatus that perhaps this was not a permanent feature of the Priest. The decals from the kit are usable but not perfect. The font of the serial number is slightly different on the real Baboon, but the flat-bottomed nose star and ID panel below it are correct. Academy has the wrong vehicle number for Baboon, it should be 12 as I viewed it in englared photos. I pieced that together from other decals. The stars on the side walls were painted over, but Baboon did have stars painted on the rear walls of the stowage boxes. They appear to be hand painted, so I copied that mode of application. The writing on Baboon's wall extension is impossible to read, but I was helped when I found a photo of some Priests dockside in England. Though they had the other style of extension walls that fit over the lowered ammo protection panels, they had some writing on the walls. I was able to decipher "M7" and "EXTENSION" but not the middle word. A search on the web revealed it to be "SIDE." That solved the first problem. The next was, how to write it out on the walls. I used some DML decals from one of recent half-tracks. They were a tad oversized but it took me two sets to achieve all of the lettering. I couldn't identify the markings above it, so I used a set of shipping stencils from Archer Fine Transfers. There is another marking to the side of the driver's visor, appearing to be three vertical lines between two short horiztonal lines. It was suggested to me that this was a sighting device used by the crew when setting up the aiming poles.
I gave the body a turpenoid wash and let it dry for several days. Then I applied a mixture of gloss and linseed oil and a touch of burnt sienna in strokes up and down the exterior. I did a little bit of daubing with some faded OD and another pin wash. I used modeling paste thinned with sand-colored paint to create the beachy residue on the lower hull, thicker on the hull wall and in the spokes of the wheels. I used a more diluted wash on the glacis and in the side racks, where churn from the ocean may have been deposited as the water lapped at the walls. I'll go over Baboon with a dusting spray of the road color when I mix it for the diorama base. The tracks also will be weathered at that time. These are the Academy tracks, which I'm not totally happy with.
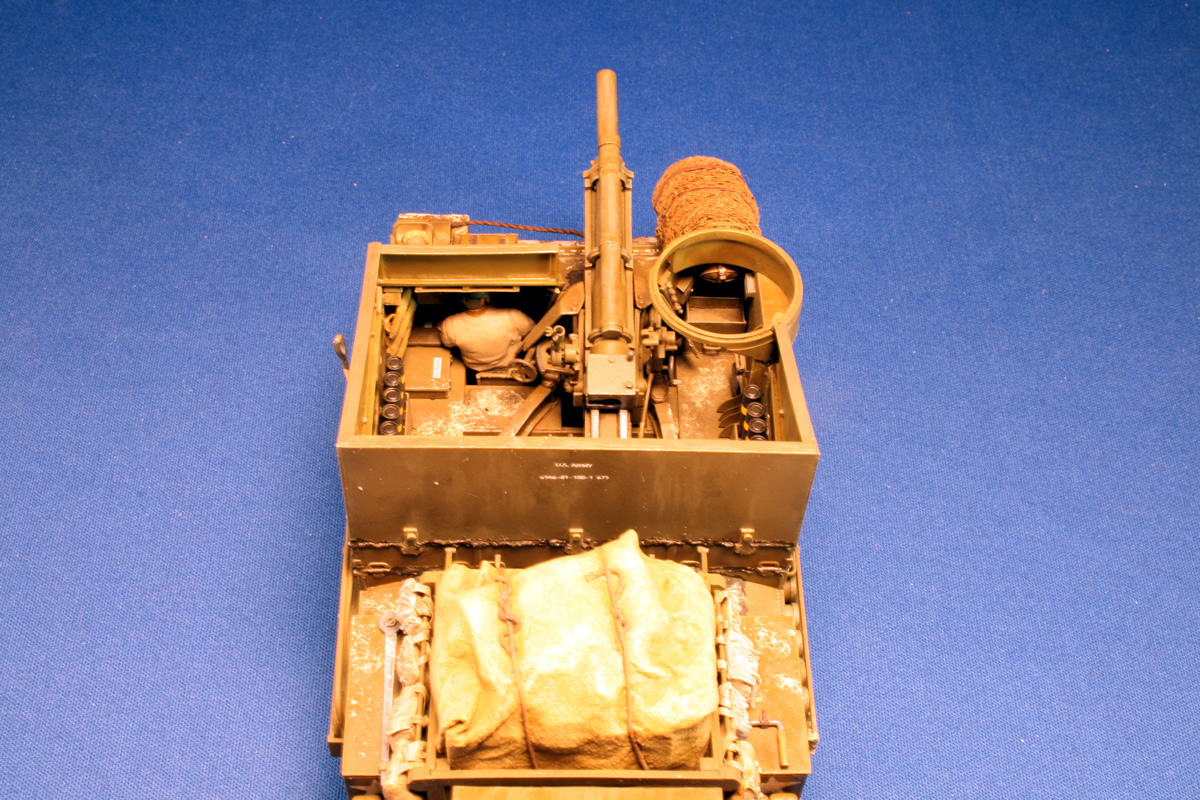
Still need to add the machine gun and crew!
It feels good to see it finally get this far! The
Historical Baboon |
 |
 |
 |
 |
 |
 |
 |
 |
 |
 |
 |
 |
|