 Construction
and Detailing Construction
and Detailing
First
of all, I drilled a vertical hole through both of the boots and
into the lower legs of the figure, and ran lengths of wire through
holes, secured with super glue. I left one inch "tails"
at the bottom of the boots to help stand the figure on a Styrofoam
block while building and painting, and to help secure the figure
to the base. I've heard and read enough horror stories about how
these larger, heavier figures can easily take a tumble at shows
or in transit. I figured wiring up the figure was a simple bit of
insurance.
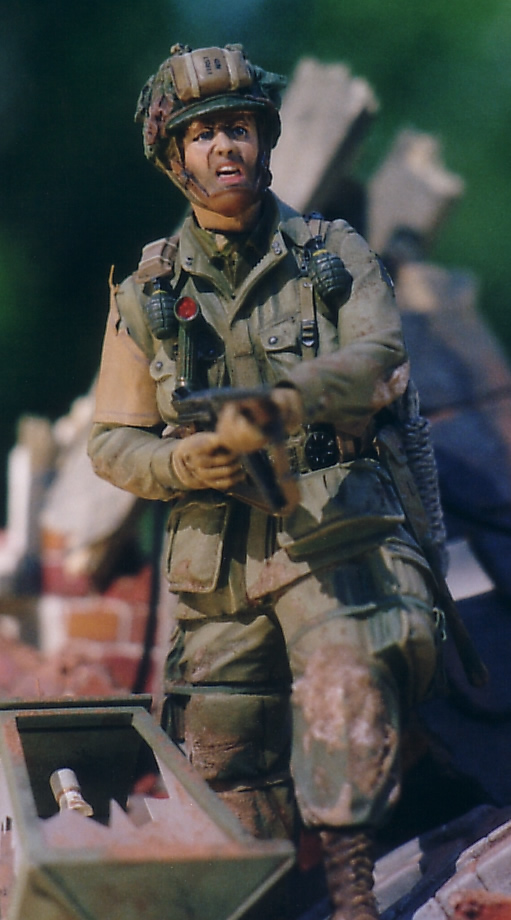
 I
made a few improvements on this kit. The most glaring problem was
that the straps for the M1936 musette bag that are molded onto the
body to not connect up with the bottom of the bag. I made new clasps
out of wire and looped lead foil through them, then hooked them
together. After gluing the bag to the back of the soldier, I ran
one end of the strap under the armpit (having used my Dremel to
grind off the molded on strap to that point), and attached the short
tab to the bottom of the musette. I
made a few improvements on this kit. The most glaring problem was
that the straps for the M1936 musette bag that are molded onto the
body to not connect up with the bottom of the bag. I made new clasps
out of wire and looped lead foil through them, then hooked them
together. After gluing the bag to the back of the soldier, I ran
one end of the strap under the armpit (having used my Dremel to
grind off the molded on strap to that point), and attached the short
tab to the bottom of the musette.
In
another bit of detailing, I ground off the knots and ends of the
restraining straps molded on top of the trouser cargo pockets; they
were replaced with tied strips of lead foil to present better dimension.
The grenades require pull rings, which were made out of wire.
I bought
a fret of 1/16 straps and hardware from Trax of VLS. The instructions
for this photoetch are so unclear that even the folks at VLS couldn't
give me much insight. I was more successful in assembling the strap
for this figure's Thompson than I was for the DML Garand (which
I eventually constructed out of foil and some of the photoetch rings
and buckles).
Finally,
I added the gas brassard made from lead foil to his right sleeve
(torn, with the securing loop ripped from his shoulder epaulet),
and a coil of rope made of string used as rigging by ship modelers
finished with some white paint.
Introduction
Construction and Detailing
Paint
and Decals
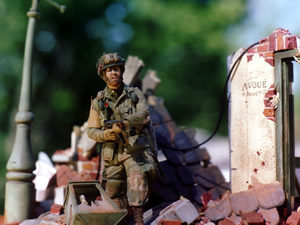
Base and Presentation
|