"Taking
Aachen" |
 |
|

| By
the Numbers . . . . |
For many years I'd wanted to do an "action" diorama. This is particularly challenging because of the lack of quality figures in attack mode — more lacking, of course, for Allied figures compared to German. While I enjoy many of the smaller vignettes of figures exchanging fire with their unseen "off base" foes, I wanted to incorporate both sides of combatants. An urban locale, with its house-to-house fighting, allows compressing the field of fire to an acceptable size for a 1/35 scale diorama much better than rural warfare, which typically spans much broader spaces. I also had a couple ruined German buildings from Verlinden that I could use, along with a lot of accessory sets I'd accumulated over the years.
However, my research of period photographs, primarily guided by After the Battle magazine's excellent issues on the battles for Aachen and Cologne, told me that the building sets I had were better suited for rural villages than a major city, so I began a search for more urban dwellings. The Tamiya M4 Sherman I had in stock would be perfect for mirroring historical photos of how armor and infantry supported one another in the fighting.
The Groundplan
In smaller dioramas, the setting is usually tertiary to the vehicles and equipment, little more than a background to give a sense of place, time, and scale. But my intention with this diorama, because of its large 40"x27" size, was to give the city of Aachen a prominence not usually seen in diorama. The city would be the third "character," on par with the American and German fighters.
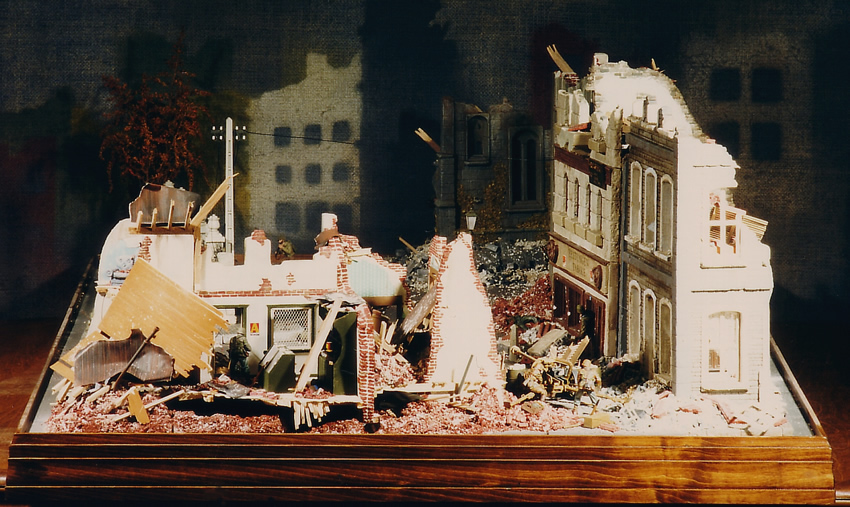
The groundplan for the Aachen dio was highly dependent on available ceramic buildings from Custom Dioramics and Verlinden Productions. One factor in selecting buildings was how the street front wall is supported, whether by a side wall on the left or right. Another point was the amount of battle damage to the structure. Some modelers might suggest it would be more expedient to create my own buildings from scratch, but when I confront the time and energy involved in that process, and the fact that I enjoy reconfiguring and detailing these existing kits, I relish the challenge of working within these limitations.
So
while I had general thoughts about the layout, the groundplan really didn't crystallize
until I had nearly all of the buildings chosen and completed to a state where
I could stand them together and move them around, testing different positions
and checking sightlines. I knew that I wanted this to be visually arresting from
any side and enable the viewer to experience the diorama from the vantage points
of either the Americans or the Germans.
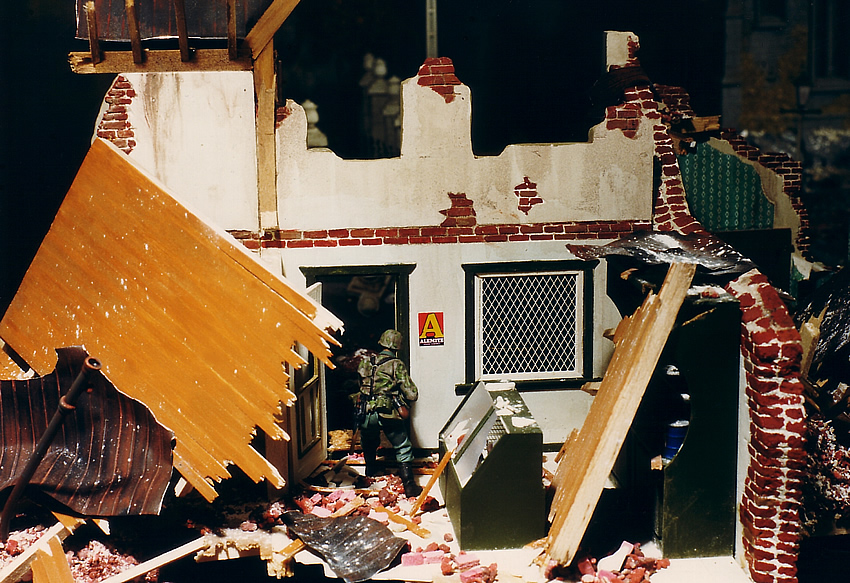
I first developed a cluster of three connected buildings, converting elements of Verlinden's Ruined Mansion (#108), Ruined Street (#097), and Custom Dioramics' German Building Ruin (#116), borrowing a wall from the latter's Ruined House Interior (#117). They came to represent an architect's office, a butcher shop and a bakery. I altered and rearranged them to create a more visually interesting grouping.
 The
other trio of buildings was anchored by a tobacco shop adapted from Custom Dioramics'
The Butcher Shop (#1101), flanked by the City House Corner (#1385) and City House
Corner II (#1425) from Verlinden. The abutting walls of these buildings needed
to be deeper than what came with the kits, so I made them using plaster of Paris
poured into wooden-framed molds.
The
other trio of buildings was anchored by a tobacco shop adapted from Custom Dioramics'
The Butcher Shop (#1101), flanked by the City House Corner (#1385) and City House
Corner II (#1425) from Verlinden. The abutting walls of these buildings needed
to be deeper than what came with the kits, so I made them using plaster of Paris
poured into wooden-framed molds.
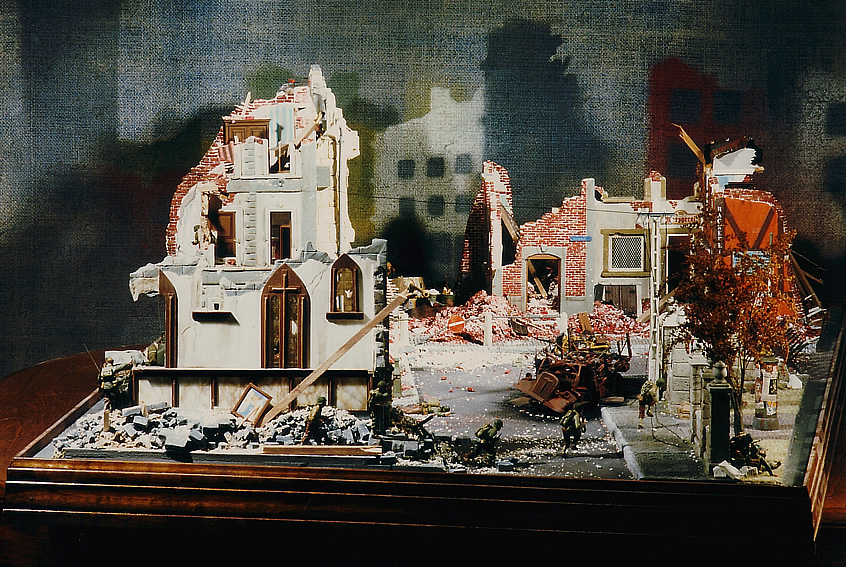
I jockeyed these two groupings into different layouts. My original thought was to do this on a circular base, but the size of the piece and the amount of "dead space" that would have to be filled around the circumference made this impractical. Ultimately, whether the base was circular, rectangular or square wasn't going to alter my desire to fully detail all sides. But it became clear that the shapes of the two major components were pushing me towards a rectangular surface.
As I tried each approach, I was particularly mindful of the city streets and how to get an arrangement that was both interesting, plausible, and provided a sense of tension. And I wanted to keep everything angled so that the planes of the buildings and streets were not parallel with the edges of the base.
While working on the groundplan one side became "the front" almost by default. At one point I'd considered putting a ruin along this front plane of the diorama, but it was too long and narrow and would have obscured more of the street fighting than whatever action I could have created within the premises of this building. I opted instead to go with my original plan, to angle in a corner of a city park. This would keep the front sightlines clear and provide some spatial variety. The tree at the front left corner (made from the astilbe plants my wife cultivates on our back yard gardens) gives a proper visual balance and helps frame that area of the diorama.
My
initial intention to place a road and Sherman at the left edge of the diorama
made it unbalanced. I had two sets of Verlinden's old Church Ruin (#096), which
proved to be just what I needed to run a wall along the narrow left edge of the
base and underscore the continuing presence of the city.
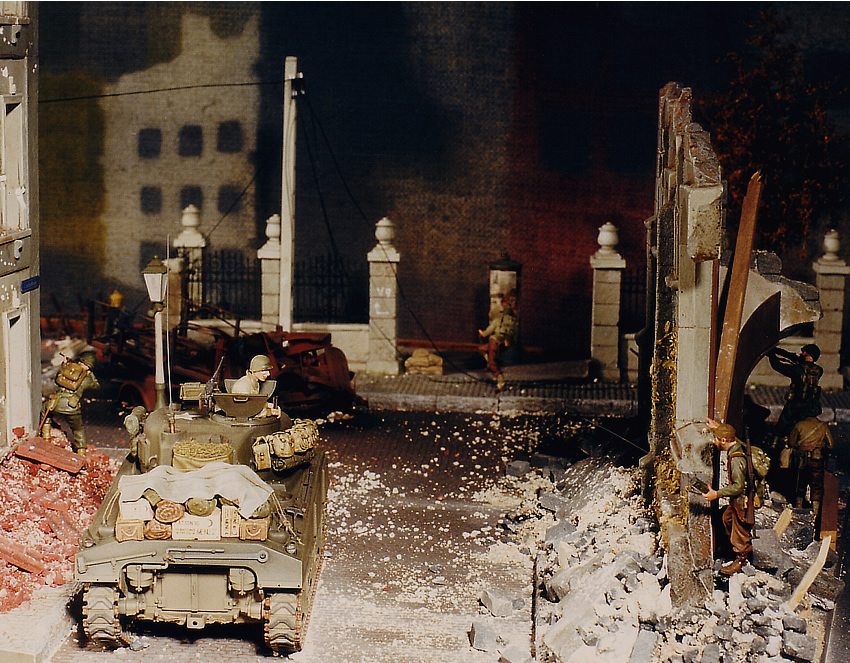 In
another departure from "the rules," the center of the diorama if virtually
unoccupied save for the burned out Opel Blitz. This was intentional, both for
historic and thematic reasons. In actual combat, the most dangerous place to be
is out in the open, in the streets. GI's learned from their experience in WWII
that it is actually safer to fight from building to building; they used explosive
charges to blow adjoining walls between buildings and fight their way through
them. So they stayed off the streets as much as they could and left it to the
tanks to break down the exterior walls of resistance.
In
another departure from "the rules," the center of the diorama if virtually
unoccupied save for the burned out Opel Blitz. This was intentional, both for
historic and thematic reasons. In actual combat, the most dangerous place to be
is out in the open, in the streets. GI's learned from their experience in WWII
that it is actually safer to fight from building to building; they used explosive
charges to blow adjoining walls between buildings and fight their way through
them. So they stayed off the streets as much as they could and left it to the
tanks to break down the exterior walls of resistance.
Secondly,
I wanted to emphasis that real estate had to be crossed for the city to be taken,
and the attacking army had to be repelled before the defendants overran that space.
Again, Aachen plays a prominent role as the "third character."
"Taking
Aachen"
The Battle for Aachen
Evolution
of the Diorama
The City
Vehicles
and Gun
The Figures
References
 |
 |
 |
 |
 |
 |
 |
 |
 |
 |
 |
 |
|