| U.S.
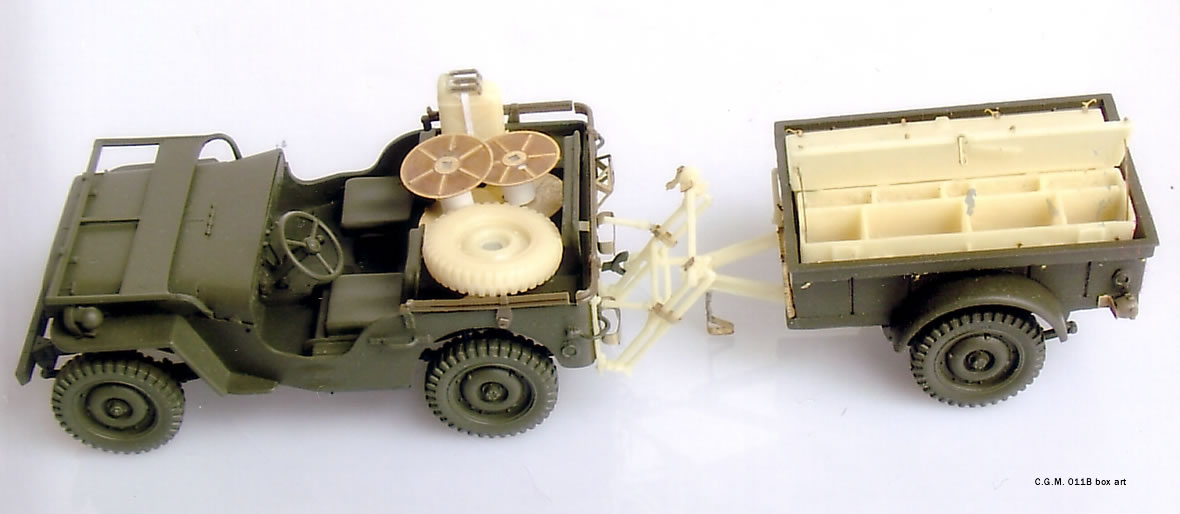
WWII K38 A Trailer Cable Splicer for Jeep |
 |
|
Modifications to the JeepThere is nothing on the instructions or box that recommends what jeep C.G.M.'s set is designed for: Tamiya, Italeri, or Heller. The most obvious choice is the ubiquitous Italeri kit, which has a much better trailer than the one Tamiya issued with it's old jeep some 30 years ago and is now virtually impossible to find. Jeep selection shouldn't be much of an issue because the only replacement part affecting the jeep is the back wall. A clue is provided by two locator holes on either side of the replacement wall, which resemble the Tamiya part, where the grab handles that wrap around the rear corners. If you use the Tamiya jeep, the corner handles fit into these holes. If you use the Italeri jeep—which, of course, includes the trailer—you will need to fill in these holes. The left and right edges of the back wall need to be shaved down a bit for a proper fit to the Italeri jeep. Be careful when you do this, however, because the piece has the reflectors cast over the edges a bit and if you just scrape down the sides you'll misshape them. I departed from the Italeri instructions and glued the rear wall to the side walls first, before installing them to the floor piece. There are two brackets that are mounted to the rear of the jeep. They are offset from center over to the left hand side. In fact, the left bracket has to pass beneath the left corner grab bar, right on the corner of the jeep, and you'll want to make sure it faces to the rear and not off to the side. You are not given any connection points on the rear panel for the other bracket, so you need to measure off of the left bracket using one of the RL-31 frame pieces. One attempt at added detailing on the rear wall is the inclusion of two sets of four holes, ostensibly those designated for attaching the racks for the jerry can and spare tire, the former of which had to be removed to provide room for this application of the RL-31 frame. The latter was fungible, as explained in the following paragraph. Unfortunately, the two sets of holes don't seem to correspond to the attachment points on either the jerry can holder or the tire mount. C.G.M.'s photo shows the spare tire rack mounted, but the wheel tossed in the back seat. Although in this particular arrangement the spare does not interfere with the position of the cable, which is set off to the left hand side of the rear wall, spares were removed so as not to hinder operation of the reel. They were occasionally mounted on the right hand side wall of the jeep over the rear tire, or secured in the back of the jeep with a metal bar that ran from the back support of the passenger seat to the rear wall; C.G.M. includes the part for that in this kit (a flat piece with one end cut at an angle) but it is not called out in the instructions. C.G.M. supplies a spare that does not have the round plate that helps secure the spare to the rack; Italeri's spare is designed to be mounted. I added the spare rack to the back wall after the jeep was essentially complete. Without any folding instructions provided, I had to refer to a Tamiya jeep to see exactly what was required. Even with minimal bending, the brass is thin enough to break, as happened with a corner of my mount. Before you install wall and floor assembly onto the chassis, you might want to carve off the oval guards on the bumper and replace them with the brass photo etch pieces. Introduction |
 |
 |
 |
 |
 |
 |
 |
 |
 |
 |
 |
 |
|