| M8
Howitzer Motor Carriage |
 |
|
The Stuart series of tanks has been a popular modeling subject for many years. Academy provided us with the M3 and M3A1 in 2001, and AFV Club released the best kit so far, an M3A3, in 2003. These followed the M3, M5A1, and M8 kits from Tamiya, which were released back in the 19'70s. Tamiya's M3 is not bad. Its turret is way too small, and the hull also is suspect, but overall it resembles an M3. The M3 lower hull was used as the basis for the following M5A1 and M8. A number of early Tamiya kits were motorized, often modifying the lower hulls to accept a standard power pack and battery. This practice spoiled several kits, including the M5A1 and M8, which in reality they used a longer hull than the M3. To fit the upper hull on the M3 lower hull they shrunk the engine deck. From a financial standpoint, this can be understood, but from a modeler's point of view it ruins the accuracy of the kit. Consequently, the M8 and M5A1 kit really need work to bring them up to date, but it can be done. BackgroundThe Stuart has been the subject of various books and Internet discussion, so I'm not going to dwell on the more esoteric details. But it might be interesting to consider the conditions under which the M8 was designed. Early in the war, U.S. armored units were either designated as light battalions (equipped with the light M3 or M5 tanks) or medium battalions (all M3 Lee or M4 Sherman medium tanks). But experiences in Africa showed that the light tanks were obsolete as fighting vehicles, underarmed and underarmored compared to their German counterparts. Thereafter, all tank battalions were composed of three medium tank companies, and one light company. Work had begun on the M8 HMC before this change. The Army authorized the development of a vehicle which could be used as assault support for the light tank battalions, i.e., when confronting strongpoints or fortified positions. First, a 75mm howitzer was fitted in a turretless M3. This was not satisfactory, as the gun had limited traverse. Therefore, a 75mm howitzer in a open topped turret was proposed. First it was to be fitted on an M3 hull, but this was switched to an M5 hull. The design of the turret meant that the front hatches could not be opened, so two hatches were placed in the front glacis plate. The vehicle was accepted for service as the M8 75mm Howitzer Motor Carriage. Production began in May 1942, and a total of 1,778 vehicles were built and used by the U.S. Army and French units. The M8 was not used in its intended role, however. The traditional light battalion had disappeared, and the tank companies used fire support from the M4 with 105mm howitzer (subject of a 2003 Tamiya kit). Instead, the M8 was used as fire support in the cavalry reconnaissance squadrons, which fielded the light tanks as well as armored cars. The Lower HullThe detail on the Tamiya hull can be used, but the basic part needs adapting. As said, the M8 used the old M3 lower hull and it's noticeably short by several millimeters. If you want to fix the lower and upper hull pieces, the best references would be Steve Zaloga's Stuart book, or an article by Zaloga in Military Modelling (Vol. 29 No. 14 Nov-Dec, 1999). Cookie Sewell also did a write-up on the M5A1 hull in Military Modelling (Special Issue No. 2 Vol. 29, No. 10 and a followup exchange between Sewell and D.P. Dyer in issues Vol. 29 No. 12 Oct 8-28, 1999 and Vol. 30 No. 3 Feb 17-Apr 13, 2000). Chris "Toadman" Hughes has a CD-ROM with reference photos that will highlight the detail you can add. (Tiger Models Design released a full resin kit of the M8 HMC in 2005, so hopefully, they might release an update set as well. There's the possibility of using the Formations hull M5A1 conversion, but that would be a shame to do. That set converts the AFV Club Stuart to an M5A1, so it means more work is needed to make it an M8. ) The transmission cover is fair, but needs some work. It has an incorrect lip at the point were it meets the upper hull. Scratch building is an option, or try modifying the piece. Wrap three bits of plastic around the transmission drive bulges and the center nose part. After letting it set, use putty to fair the pieces in, and add some casting texture. After all this work, you still need to plug the various motorization holes, and as usual with Tamiya, you must supply your own sponsons. Suspension and TracksThe suspension is not entirely accurate either. The bogies are quite fine, and compare favorably against the Academy ones. The wheels have some big seams, the skids are thick, but with some more work this will do for most tastes. The sprockets are wrong, with an incorrect number of teeth. Get a sprocket ring from a DML Sherman kit. The rear idler assembly needs some detailing. The inner spring is not present at all, there should be a cut out, and a small disc at the front plate. The best overall solution is to buy AFV Club's separate suspension set, and fit this to a modified or scratch built lower hull. (This set actually gives you more than just the suspension. It also comes with grousers, periscopes, grab handles, towing eyes, antennas, a transmission cover, front faces for the siren and headlights and some British tank bits like fire extinguishers and smoke dischargers.) The tracks also need replacing. The end connectors are molded to each single link, rather than spanning them to connect the links. As molded, the tracks would fall apart in pieces! By far, my favorite substitute is the AFV Club individual link set, although there are other options: Academy vinyl tracks or link-to-link type, AFV Club vinyl tracks, Accurate Armour resin, or the Model Kasten set (the latter is only recommended if you're a modeling masochist). The Upper HullRemember, the upper hull is too short. The references build-up articles from Zaloga and Sewell will help you here. The upper hull has a new turret ring part. This has the periscopes molded shut, so you could drill them out, and fit the AFV Club periscopes. The rear hull has molded on details like the fuel filler caps, engine screens, and tiedowns, but it does come with separate grab handles. These have a bit of flash however, and making them from wire is easy enough. Replacing the grills with PE from Eduard would go a long way in improving the look as well. The mentioned upper hull part has the weld seam included, but as it's a separate part, this sits actually next to the joint, so there is still a small seam. Further bits on the hull include tools, which need straps, and the front light, sirens and associated brush guards. The brush guards are fairly thick, so a replacement might be useful. The shapes however are more difficult than Sherman brush guards, and some work with a file will save you some money. Once the hull exterior is done, you add the hull interior. Basically, this is four parts. Lower hull floor, under the turret ring, two complete assemblies of the ammo storage and a fire extinguisher. No front detail is included for the driver's area. The Verlinden interior set would be helpful here, or if you're lucky, you have the old YANKS M8 detail set still stashed away. The TurretThe turret assembly starts with the gun. This has quite nice details, and is a good basis for super detailing. Zaloga's article gives good guidance here. But back to the kit. The turret gets some interior bits: two grenades in molded on racks, two small stowage boxes, and three seats. That's all. The .50 M2 on the ring at the rear is best left alone. Get a replacement from Academy or your own favorite resin set. Hervé Charbonneau supplied me with some info over on the Missing Lynx discussion groups that the machine-gun ring included in Academy's and AFV Club's M18 is the same as in this kit. AFV Club includes the better gun of the two, so this might be an option. The turret sides get grouser racks molded in one complete assembly. Scratch building will give you more detail. The AFV Club suspension set contains 32 grousers, maybe not be enough for the whole turret, but the parts are a lot better defined than the Tamiya parts, and building the racks is easier than making the grousers. Also remember to add the weld seams at the turret front. They are present on the kit, but can use some stronger definition. Figure and MarkingThere's one figure included, dressed in the winter combat jacket, holding a binocular. Details are soft, but with some careful painting and new hands and head, he serves the purpose. Markings are included for three vehicles. One of these has ID numbers for an M8 displayed at the Aberdeen Proving Ground, so for me this is the least interesting option. The others are for two WWII units that served in Europe, both in plain olive drab. One is from HQ, 67th Tank Bttn, 2nd AD. The other is from F Co., 85th Cavalry Reconnaissance Squadron, 5th AD. Markings include stars, serial numbers and a yellow bridge marking. French vehicles provide a more colorful alternative. Take a look at www.chars-francais.net for photographs. You'd need to get your own decals however. Again, AFV Club provides several decals in their M3A3 kit, so the basics are there. Serial and unit numbers need to come from other sources. Overall, this kit can't be rated as good by today's standards. It's a basis to start from, but an accurate M8 needs a lot of work. Much can be done by using the AFV Club suspension and tracks. But this still leaves you to do the reworking of the hull, and detailing the turret. The fact that AFV Club included the later pressed wheels in the set might indicate they're working on an M5 as well. Hopefully, the M8 will get the attention it deserves in the future. -Martin
Dogger- |
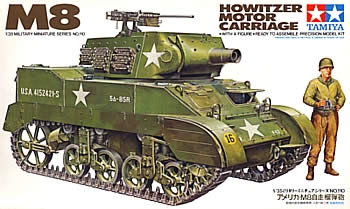 Tamiya
 |
 |
 |
 |
 |
 |
 |
 |
 |
 |
 |
 |
|