|
U.S.
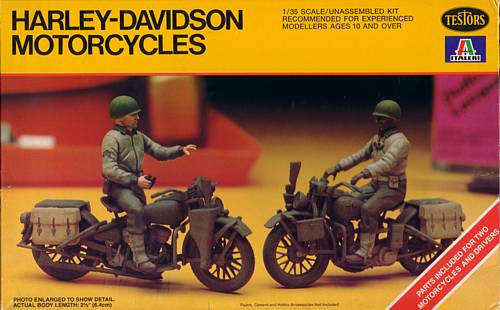
Army Motorcycles/Harley Davidson Motorcycles |
 |
|
Italeri
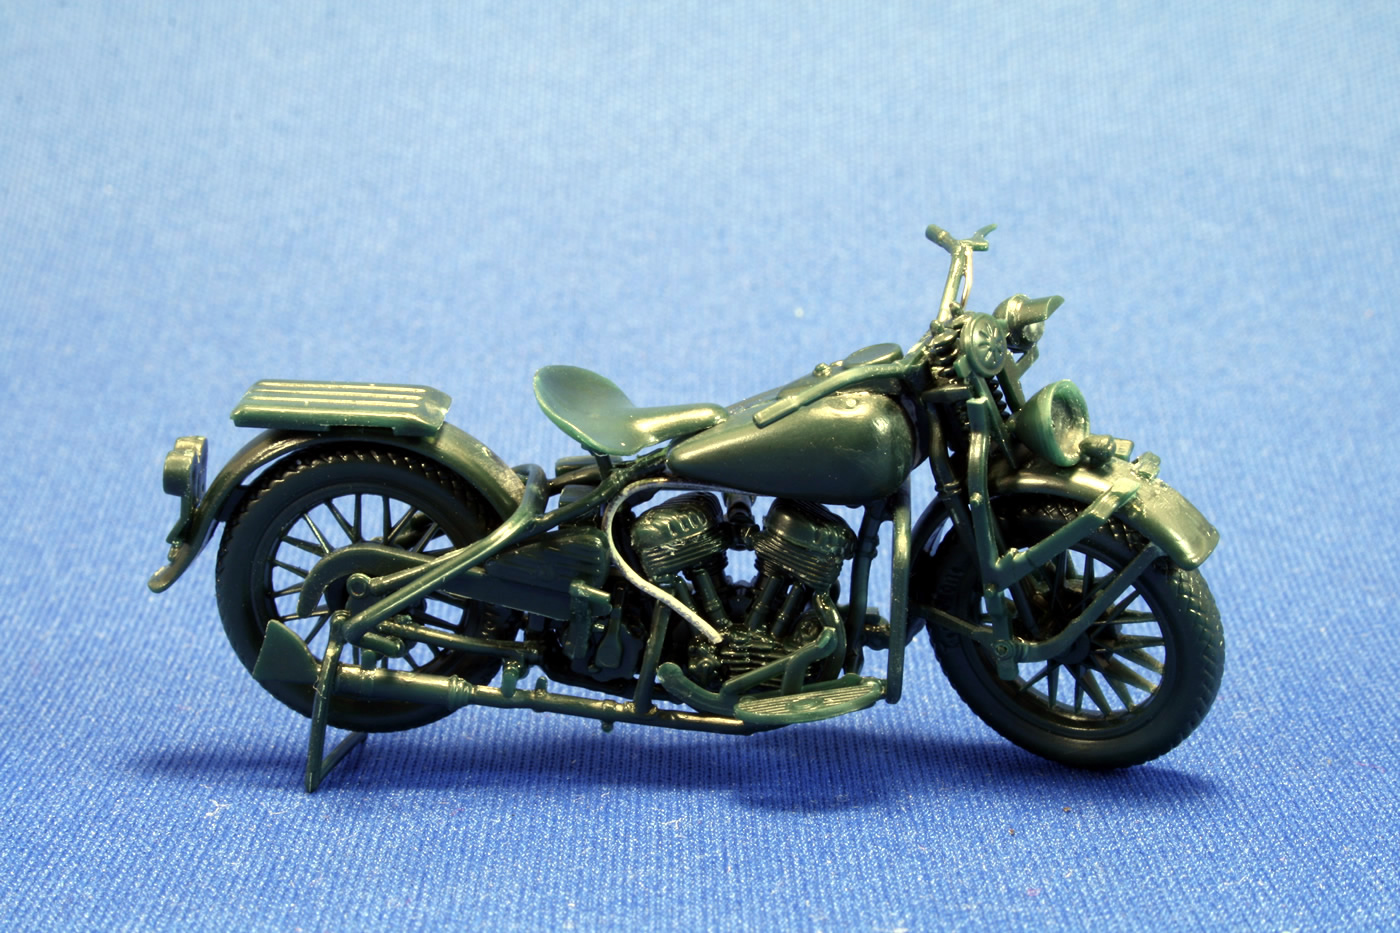
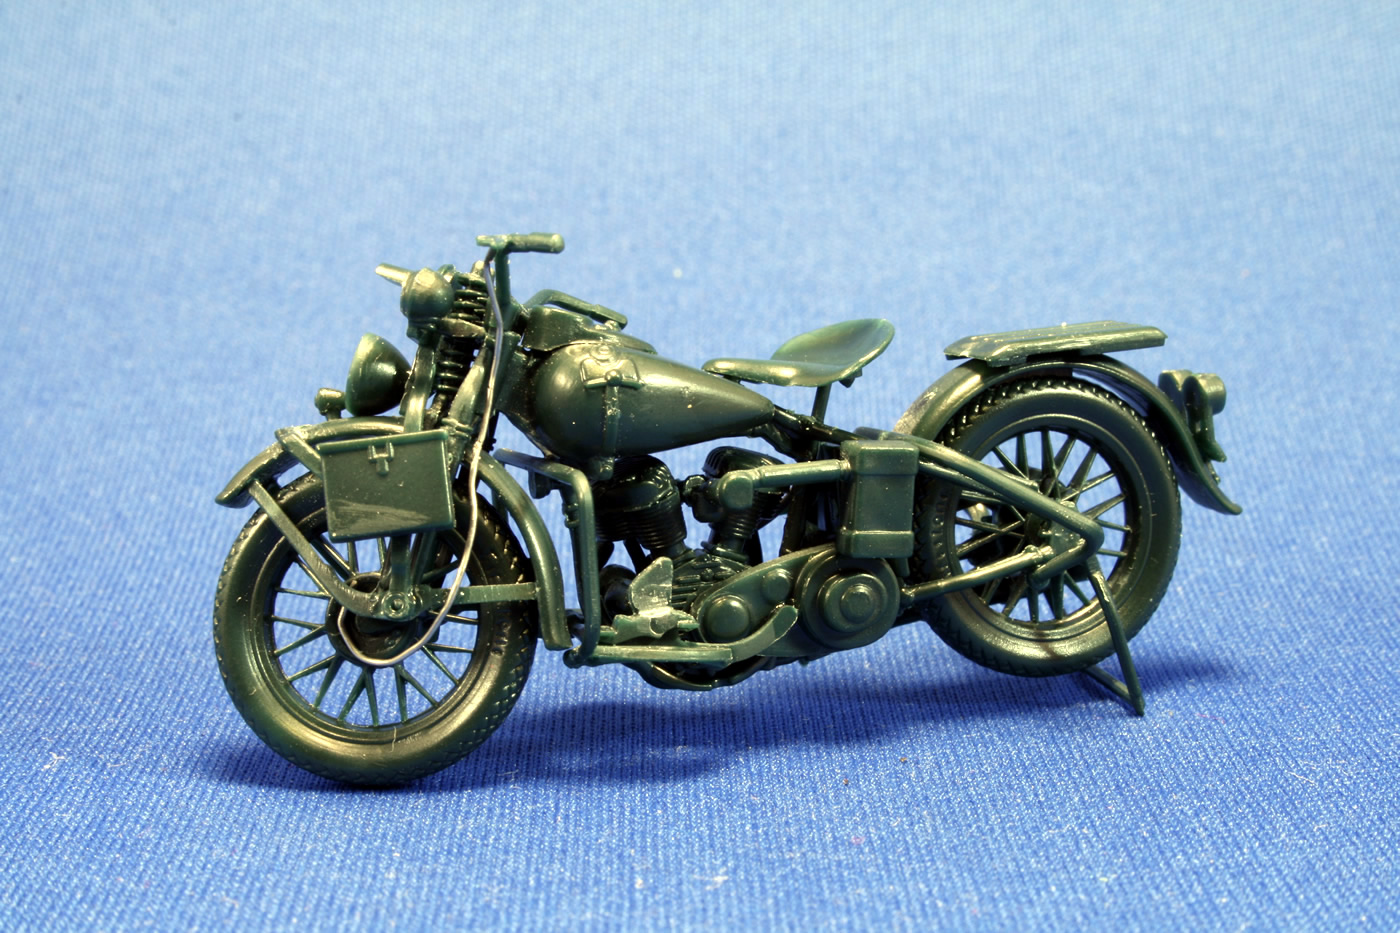
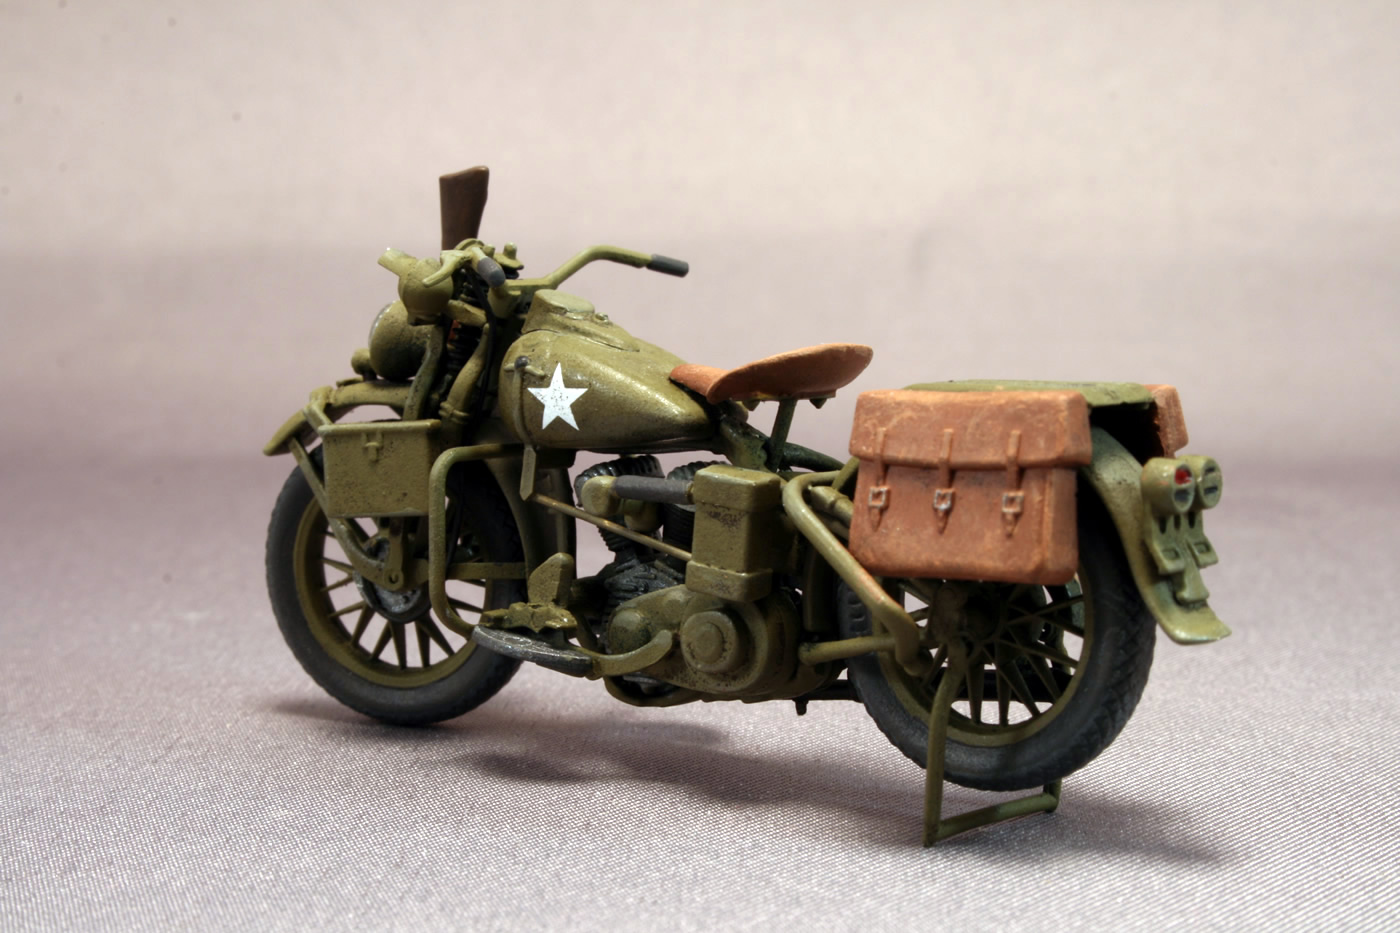
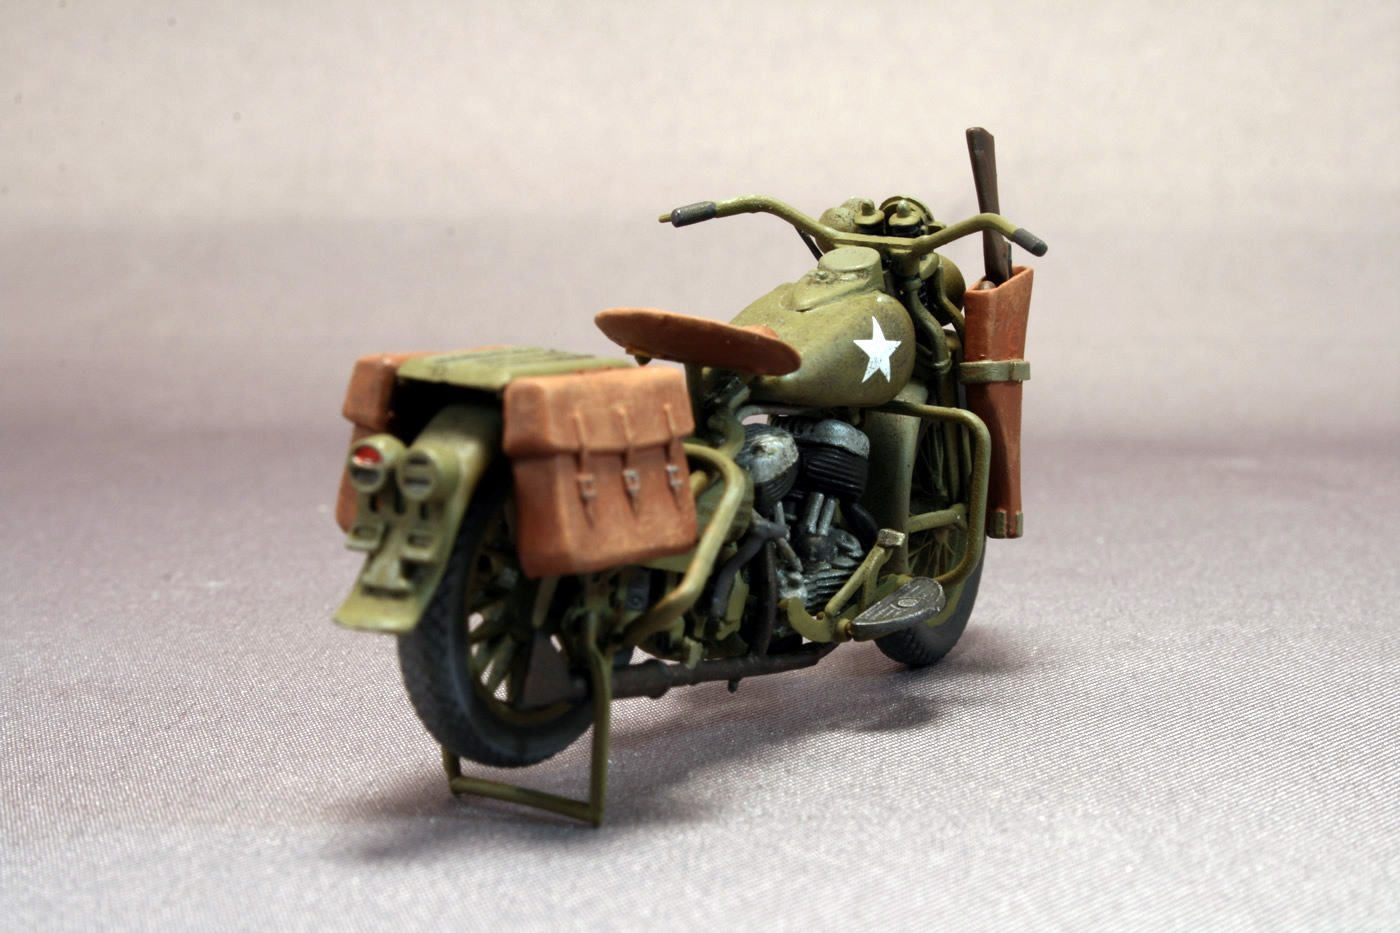
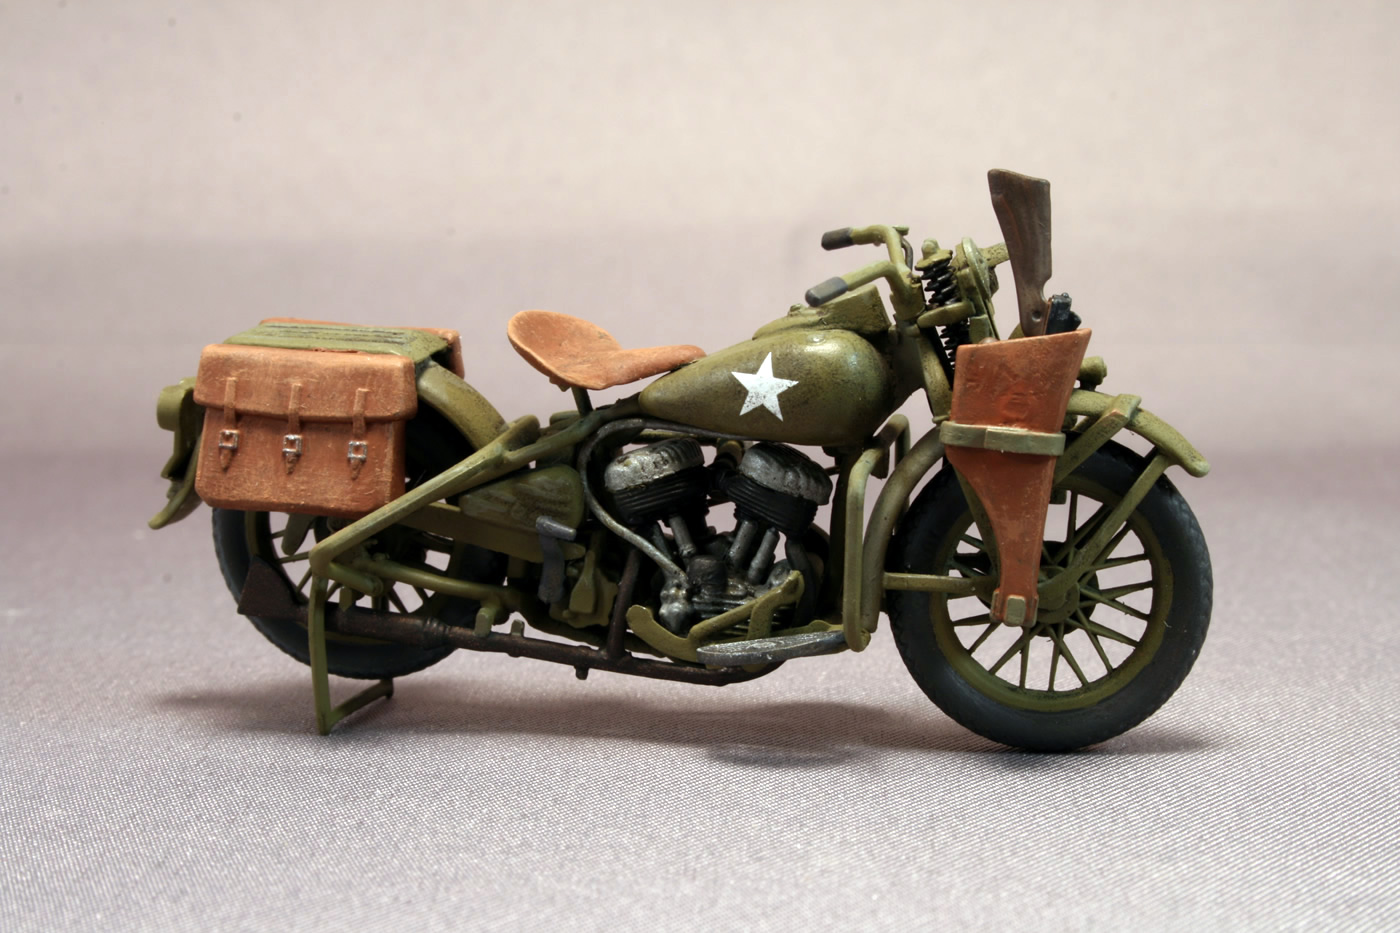
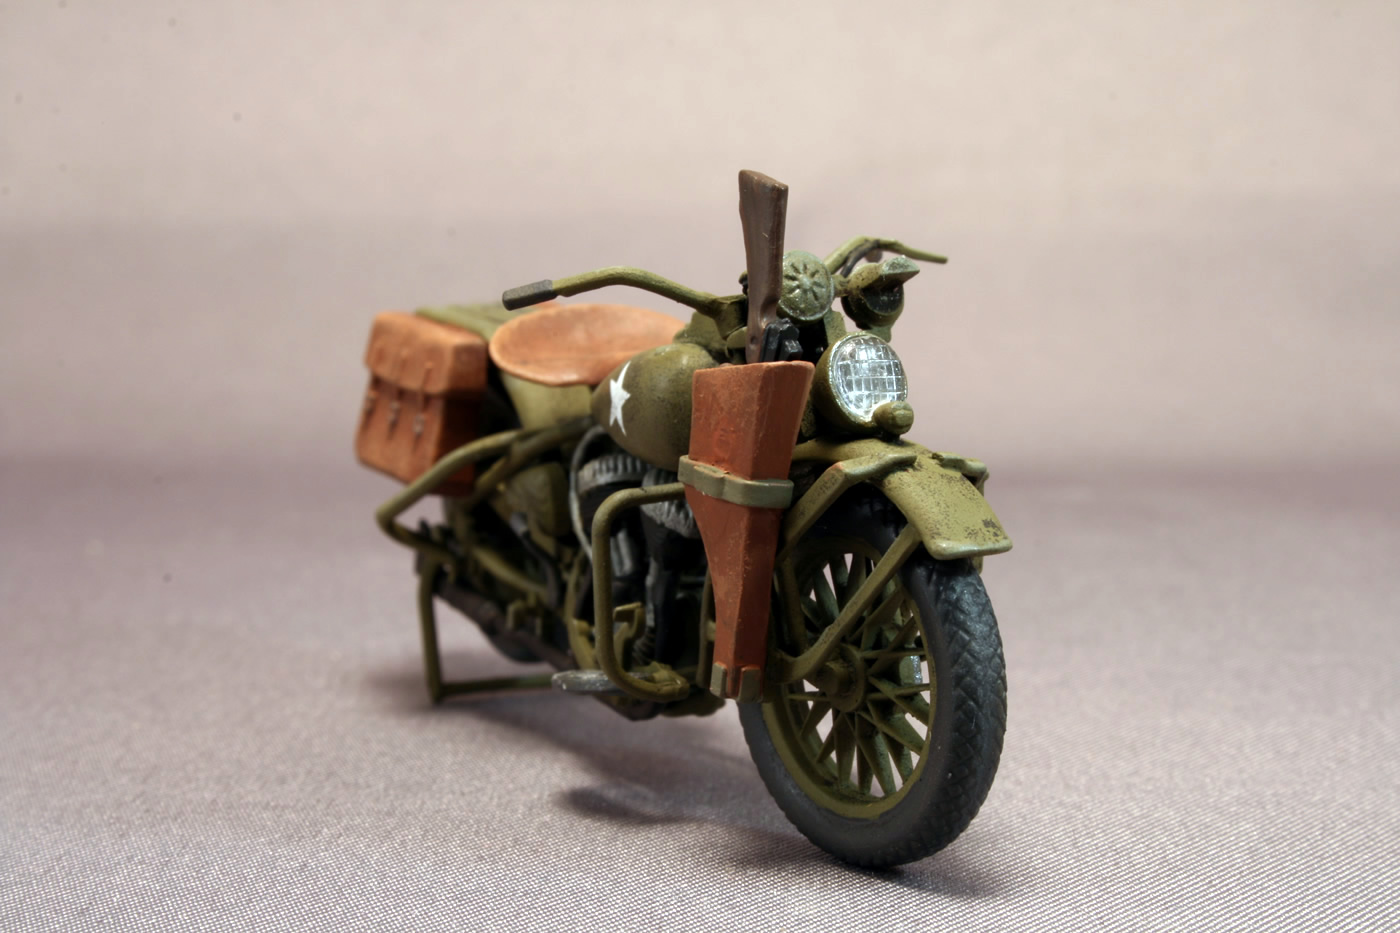
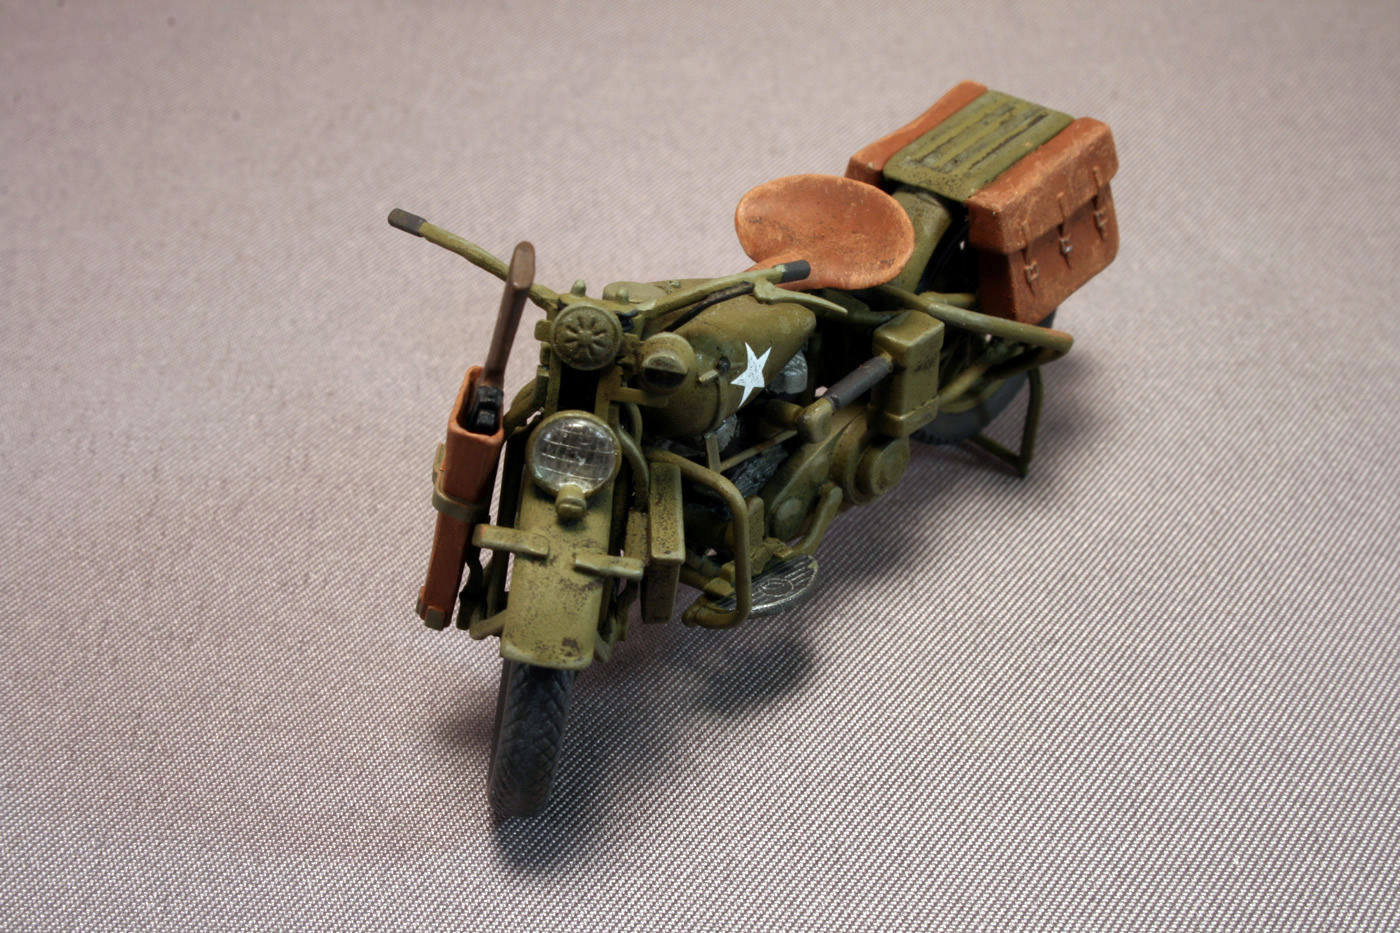
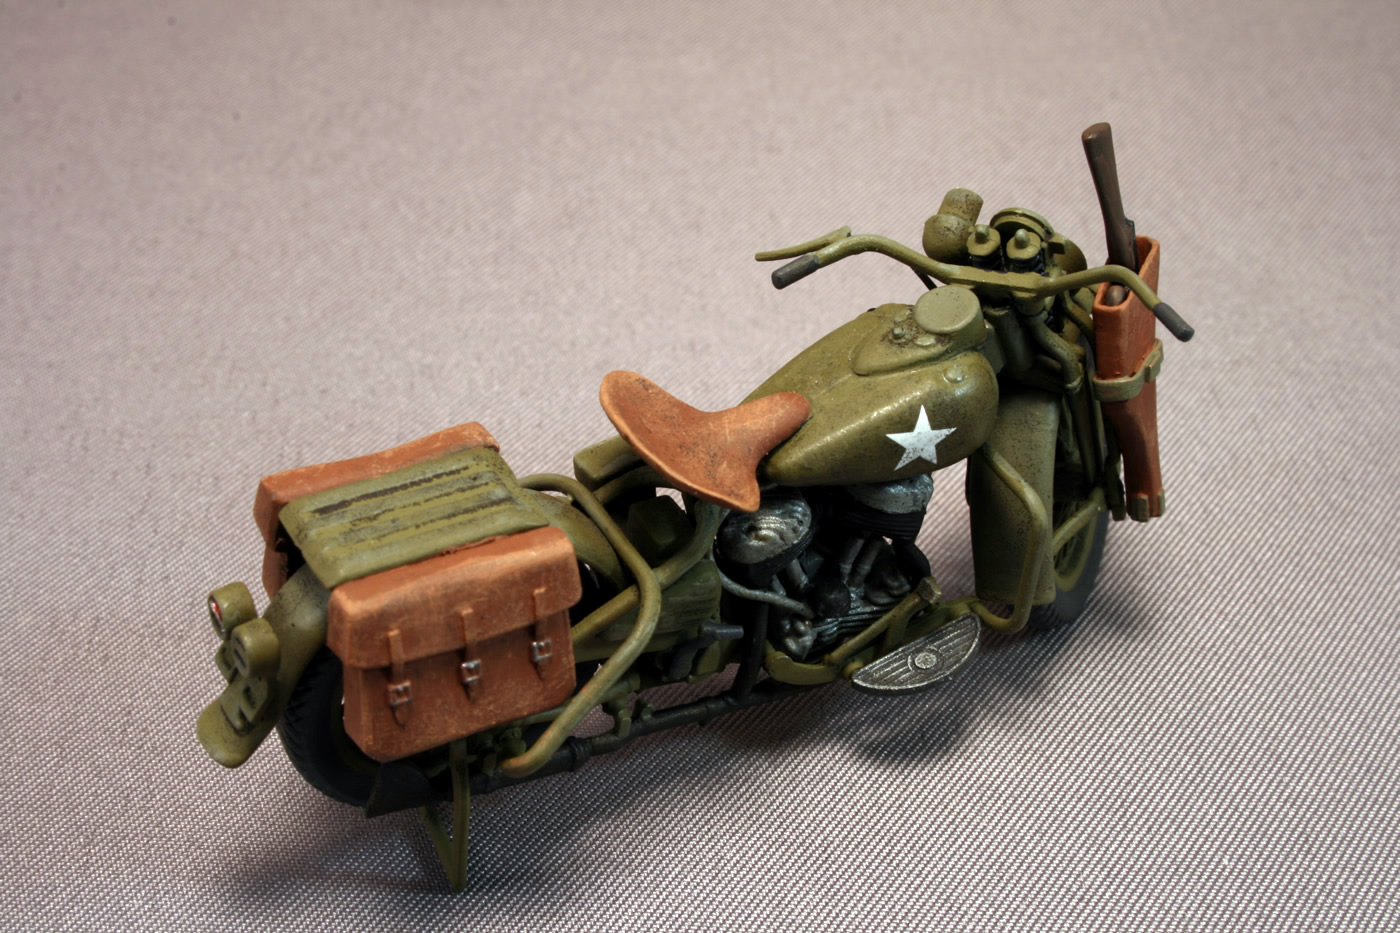
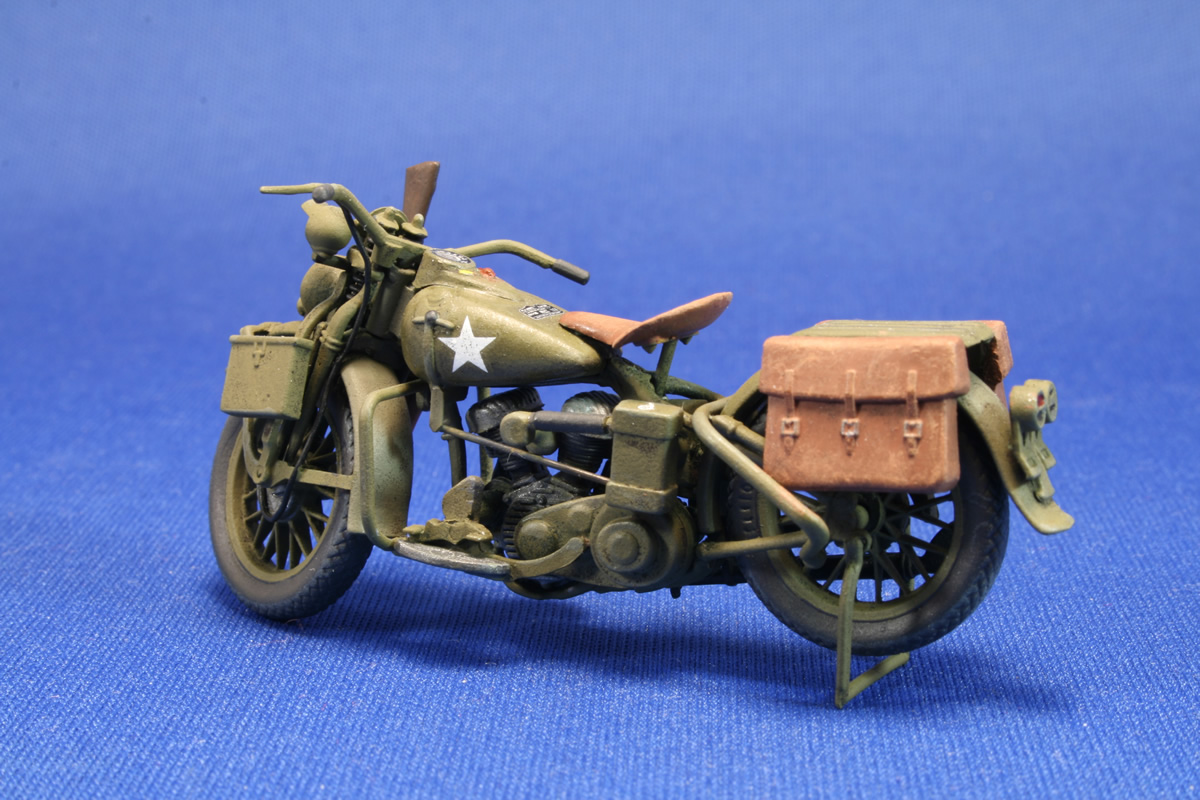
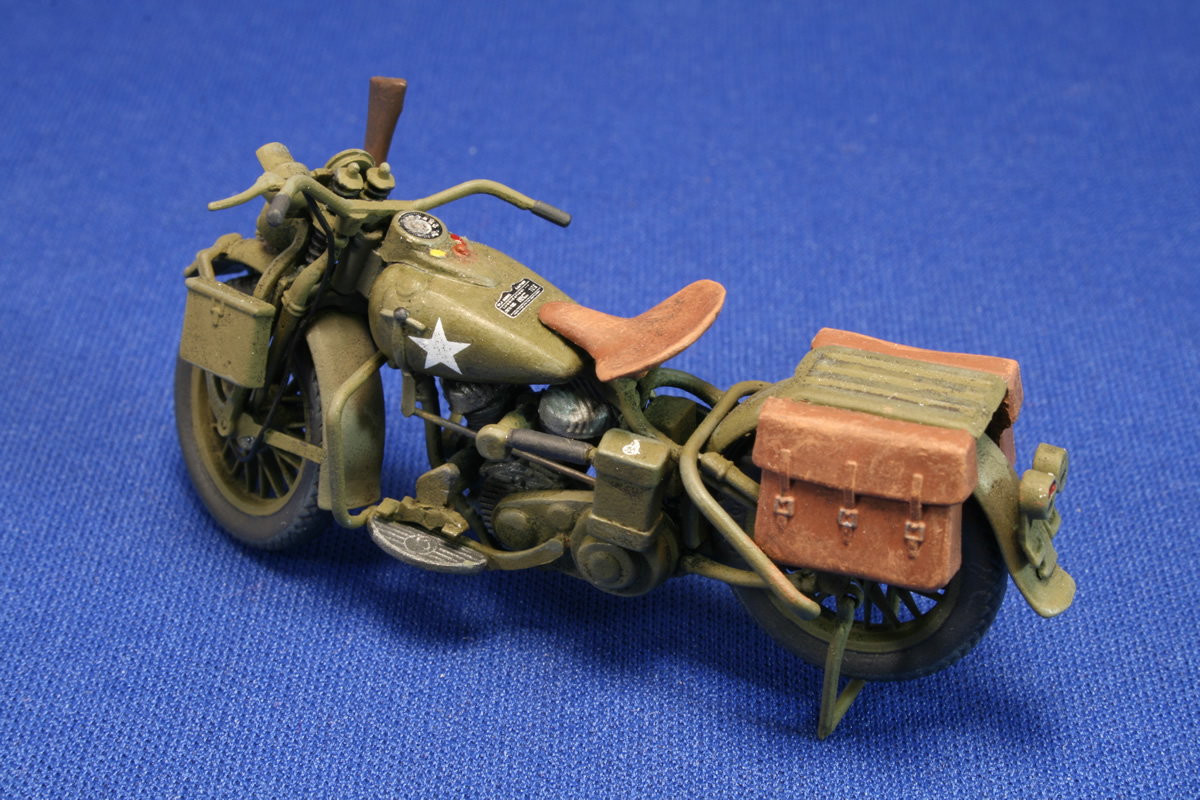
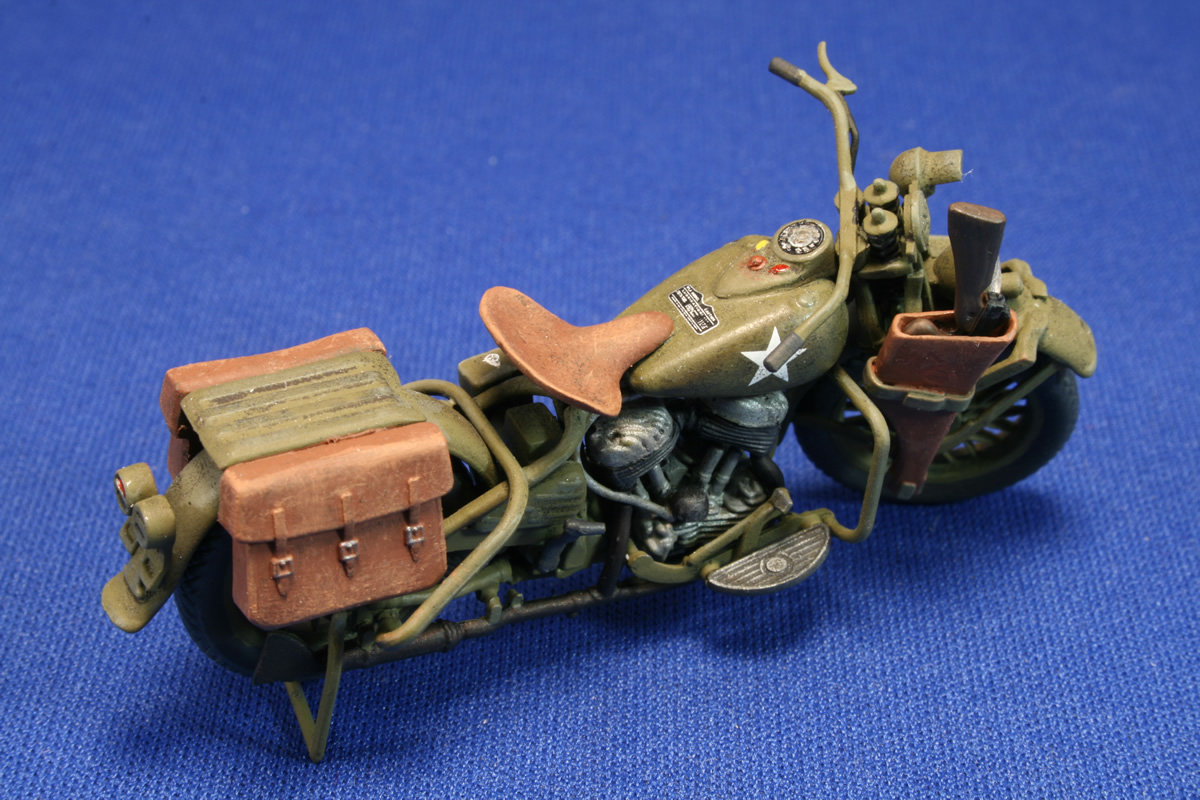
322 This is an early Italeri kit, repackaged by Testors, that I had bought years ago but did not get around to building until the more advanced MiniArt Harley Davidson was released in 2010. After looking through that kit’s miniscule plastic parts and numerous thin photoetch pieces (several of which need to be bent on a jig), I decided to crack open this old kit and use it as practice before tackling the new one. I also had a partially completed Tamiya motorcycle stashed away that had become separated from some of its engine parts. Comparing the three kits, the MiniArt is definitely the winner as far as accuracy and level of detail, but the Italeri is not too far behind. The main advantages to MiniArt’s are the photoetch wheel spokes, additional detailing, and decals. But the Italeri builds into a nice replica without the AMS stress. Plus the Testors boxing includes two kits and figures. One advantage of the Testors set is the clear layout of the assembly instructions, with an actual narrative format. There are no trip-ups in the building process, and there are a few opportunities to make modest improvements on the parts. For example, I carved away some of the plastic that bridges the underside of the fenders and wheels, particularly noticeable on the front wheel. The saddle bags cover a good portion of the rear wheel. Speaking of the bags, I filled in the hollow back sides of both the bags and the metal box mounted on the front strut because there’s a chance the backs can be seen. I also cut off the stock of the Thompson submachine gun and drilled out the opening of the scabbard. I added the back end of a spare Tamiya Tommy gun and refashioned the mounting strap from a thin strip of tin. The scabbard itself had some sunken areas that I puttied. These improvements produce a much more realistic effect.
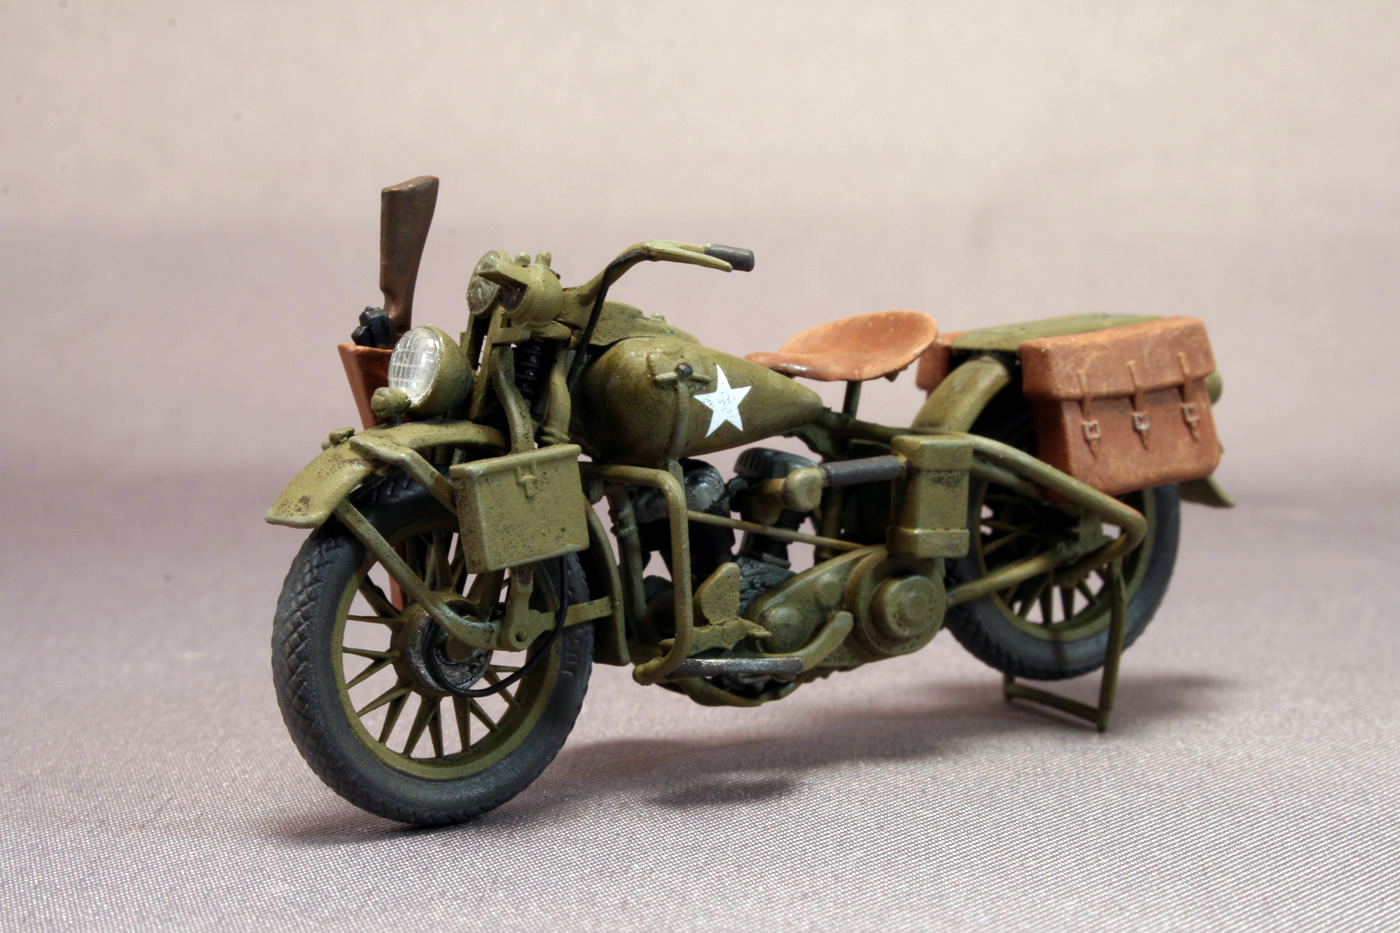
Another simple improvement was adding thin wire to represent gas lines and the brake cable. The solid headlight was hollowed out with a Dremel, the bowl was painted silver, and a spare clear plastic part was inserted. The kit was sprayed OD, then the tires, air filter hose, and handle grips were painted PollyScale tarnished black. The leather seat and bags were done in PollyScale rust and drybrushed with lighter hues to give a worn look. Other engine and metal parts were painted in metal grays and silvers. The model received the usual wash and highlighting.
Unfortunately, the kit lacks decals. Though not all motorcycles featured them, I scrounged up a pair of stars for either side of the gas/oil tank. Some cycles, particularly those used by military police, had more extensive markings. There is no instrument gauge decal, but Archer Fine Transfers produces dry transfers of gauges and other markings for the MiniArt kit that work on the Italeri kit as well, and as there are enough for three motorcycles, you’d cover both Italeri bikes for a mere $6. Here you can see the instrument dial, placard, and air filter marking. The transfer instructions suggest using a drop of clear epoxy cement to make the instrument dial glass. I brushed a dab of gloss varnish and it had the effect of slightly smearing the transfer's ink, so follow the instructions.
The figures are typical of old Italeri kits, rather stiffly posed, simply sculpted, with zombie-like expressions. If you really want to use these as riders, swapping the heads with Warriors or Hornet options would help immensely. But as one can see from the box art, adjustments will need to be made to one of the figures to get him to grip the handlebar realistically. (The Tamiya kit actually has a much better rider than found here.) Overall, this was a good kit for its day, and still is a respectable option for modelers who may be intimidated by the fragile parts and photoetch in the MiniArt model. Given there are two bikes in this set, it might be a good father-son project for modelers with a little experience under their belts. -tss- |


 |
 |
 |
 |
 |
 |
 |
 |
 |
 |
 |
 |
|