| U.S.
Tank Destroyer M36 Jackson |
 |
|
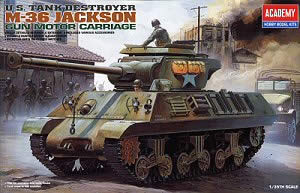
A logical follow-up to Academy's M10 GMC series, this is a kit of the 90mm M36. It shares a lot of parts with the older kits, with additional sprues providing the new turret, hull front plates, and rear engine deck details. The total number of plastic parts is 625 (with many of those left over for your spares box), plus nylon twine for the tow cable, flexible "rubber band" tracks, and a decal sheet. As the kit is based on the earlier M10 kits, you can build either the gasoline powered M36 (built on the M10A1 hull with the larger engine deck grill) or the M36B2 with diesel engine (based on the M10 hull with the smaller grill) using the appropriate engine deck parts in the box. While the instruction booklet points out different choices in parts during the assembly, you need to first consult the paint and decal page to determine which of the versions you are going to build. For example, there are two different glacis plates, allowing you to build either a WWII version, which did not have the .30 cal bow MG, or the post-war version which did incorporate the gun. Some modelers may be misled by the bow gun in the box art, which one could easily assume is a WWII illustration. So with several building options, you need to be careful with your choice of parts in this kit. The third M36 variant, the M36B1, used this turret on a standard M4A3 hull (as presented in Italeri's old kit). This came out of an urgent need for more tank destroyers on the front lines in 1944. Only 187 were built by the end of that year, but the M36B1 was the most heavily armored U.S. tank destroyer during the war, and the only one with a bow machine gun. The turret from this kit could be used on a stock M4A3 hull, and the left over Academy hull converted into a M35 prime mover, but that is another story. This is the nicest plastic suspension available in a kit. You're provided with several options. Drive sprockets are the simple plate sprockets, or the revised fancy sprockets. Road wheels are either the stamped solid spoke or open spoked versions, both with excellent details. However, photos suggest that the solid spoke wheels were used most, if not all, of the time. These wheels come with rear inserts for detail on both sides. This is also the case with the idlers. Again, check your references. The suspension bogies, which originated with Academy's M12 kit, are the heavy duty VVSS with straight return roller arm and spacer, and casting numbers are included. You have a choice of the earliest, round track skid or the more familiar skid, that leans toward the front of the vehicle. For a late vehicle like the M36, the later skid seems the only option. The skids are molded separately thus making clean up and filling of the joint on the top of the bogie quite easy, and some thinning will improve the appearance. Details can be enhanced by adding the bolts to the skids, and drilling four mounting holes on the front of each bogie. These bogies were interchangeable between sides of the vehicles, and the return roller arm could be mounted on either side of the bogie. The supplied plain rubber block tracks are nicely molded, but you could also use a set of T45 steel chevron tracks from Tamiya's M4A3, especially if you are building your kit for a winter time period. There are two choices for the one-piece transmission cover, either sharp nosed or more rounded. The lower hull has the essential interior components including gearbox, crew seats, steering levers, foot pedals, and instrument panel. The fighting compartment has the lower floor included, together with a fire wall and the sponson mounted ammunition. This isn't correct, as it shows the layout used in the M10. Nevertheless, it would be hard to notice and at least there's something back there to look at. The engine compartment gets side walls and fuel tanks, but no engine. That's a pity because the engine doors are separate parts. As said, you get parts for M36 and M36B2. The instructions have you build an M36 with the M4A3 pattern rear plate and engine doors. The M36B2 uses the same the upper hull as in the M10 kits with all the parts provided. (NOTE: If you build the M36, you can use the spare M36B2 parts to update Italeri's M4 Marines. This is supposed to be an M4A2 but it does not provide the correct rear plate details and exhaust arrangement. These are covered with wading trunk so they are not necessarily visible, but if you're not using the trunks, you'll need to add those details.) The hatches in the M36 kit are quite nice, with separate periscopes and handles. These are mounted onto a one piece upper hull, together with the front plate. Overall, the other details are good, but the headlight guards could use some thinning down, the tools need attachment straps, and the rear exhaust deflector is a bit thick. The turret is quite busy and has nice details included. Again, small improvements can be made, such as wiring. The gun assembly is much better than the one in Italeri's M36B1, and the turret basket has the correct layout. There is no ammo to fill the ready round bins in the turret bustle. Academy provides three barrels: a barrel with thread protector without muzzle brake; the late war double baffle muzzle brake; or the post-war single baffle muzzle brake with bore evacuator. Sadly, the barrel with threaded end is not provided. For the rear MG mounting, you can choose between .30 and .50 cal. In the field, M36s often had the .50 cal moved from the awkward rear bustle position to the left front of the turret opening, or they supplemented firepower with .30 cal MGs. The bits on the turret rear for stowing the .50 cal are good and are easier to attach than photoetch parts. Turret roof armor is an option, but Academy gives the folding flaps as one big part, instead of the three actual segments. Create three sections by cutting between hinges two and three, and four and five. Usually, the middle section was left shut. You will also need to score the divides between the small flaps that open for the gunner on the front and right of the armor (Squadron's U.S. Tank Destroyers in Action is a good reference for this). Academy provides a variety of casting markings, letters, numbers, bolts, tie-downs, and other bits to further detail your vehicle. You get four options for markings, all for vehicles painted olive drab:
Overall, this is a good kit. There are a lot of parts, resulting in a nicely filled Sherman bits box, and the quality of detail and molding is good. Of course, there's room for improvement, but out of the box you get a nice model of the M36. If you want to use detail sets, there are several options out there, including:
-Martin
Dogger- |
 Academy
 |
 |
 |
 |
 |
 |
 |
 |
 |
 |
 |
 |
|